

These adorably festive candy cane cookies offer all the holiday charm without the peppermint flavor. Tender, sweet, and buttery, they’re easy to customize (peppermint option included!), and perfect for all your holiday gatherings!

These candy cane cookies are adorable and perfect for those who don’t love mint but enjoy the festive look of candy canes! They capture all the holiday charm of the red and white twist without the strong peppermint flavor.
I don’t actually like mint myself, so when my youngest picked this recipe from one of my vintage cookbooks that looks like a candy cane but tastes buttery and sweet with hints of vanilla and almond, I was sold.
I do know that so many of you love mint, which is why I’ve shared my slow cooker peppermint white hot chocolate and white chocolate dipped peppermint cookies with you all. You know I’ve got you, friends. If you are looking to incorporate the signature mint flavor, it’s an easy swap, and I explain exactly how to do that down below.
Either way, these candy cane Christmas cookies are too cute to miss! Bake up a batch for a cookie exchange or to add to your holiday baking list for a nostalgic Christmas treat that everyone will love!
Candy Cane Cookies

Why you’ll love this recipe
- They’re easy and impressive!
- Flavors can be customized
- Ready in under 30 minutes
- They make great gifts!
Ingredients
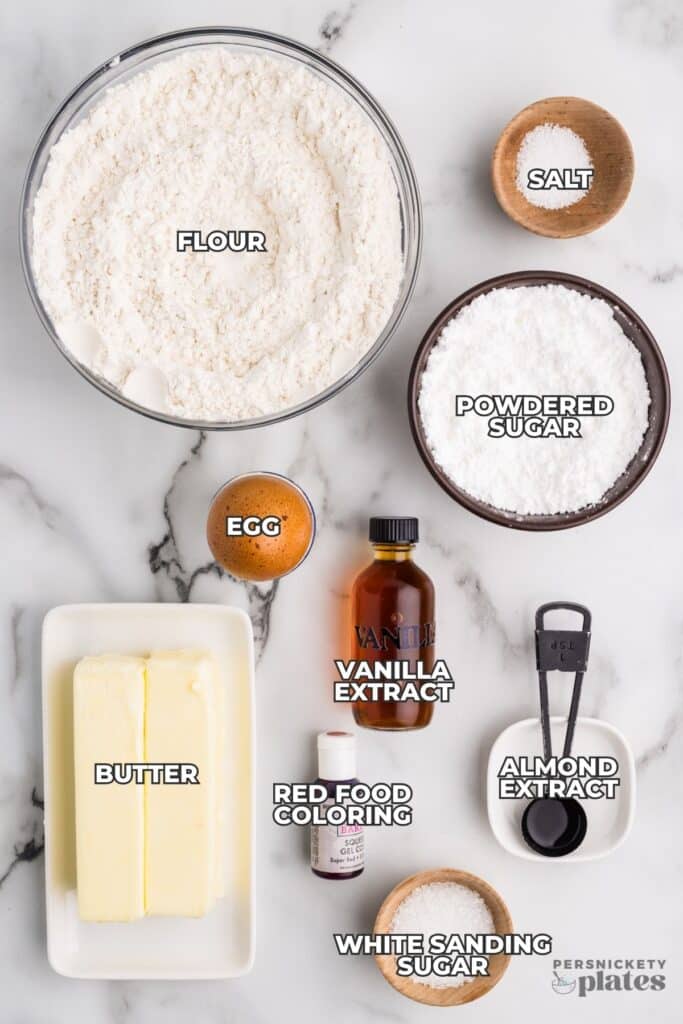
Below is a list of the ingredients you’ll need to gather to make this recipe, why you need them, and possible substitutions. Scroll all the way down for the full recipe card with measurements.
Jump- Butter: I use salted butter for enhanced flavor, but unsalted is fine too. Soften to room temperature.
- Powdered sugar: AKA confectioners’ sugar. For sweetness and a bit of extra structure.
- Large egg: Helps to bind the dough. Bring it out to room temperature with the butter.
- Almond and vanilla extract: I use both almond extract and vanilla extract for a delicious pairing.
- All-purpose flour: Measure the flour properly to ensure your dough isn’t dry and crumbly.
- Salt: Brings out the flavors and balances the sweetness.
- Red food coloring: You can use either gel food coloring or liquid food coloring, gel being a bit more vibrant.
- White sanding sugar: Usually found by the sprinkles. If you don’t have any, you can use regular granulated sugar.
Pure almond extract will have nut proteins so be sure to disclose the ingredients when serving these for potential allergy issues. Imitation almond extract is often nut-free, but always read the ingredients of your particular bottle to be safe.
How to make Candy Cane Cookies
This section shows you how to make this recipe, with process photos showing the steps to help you visualize it. For full instructions, including amounts and temperatures, see the recipe card below.
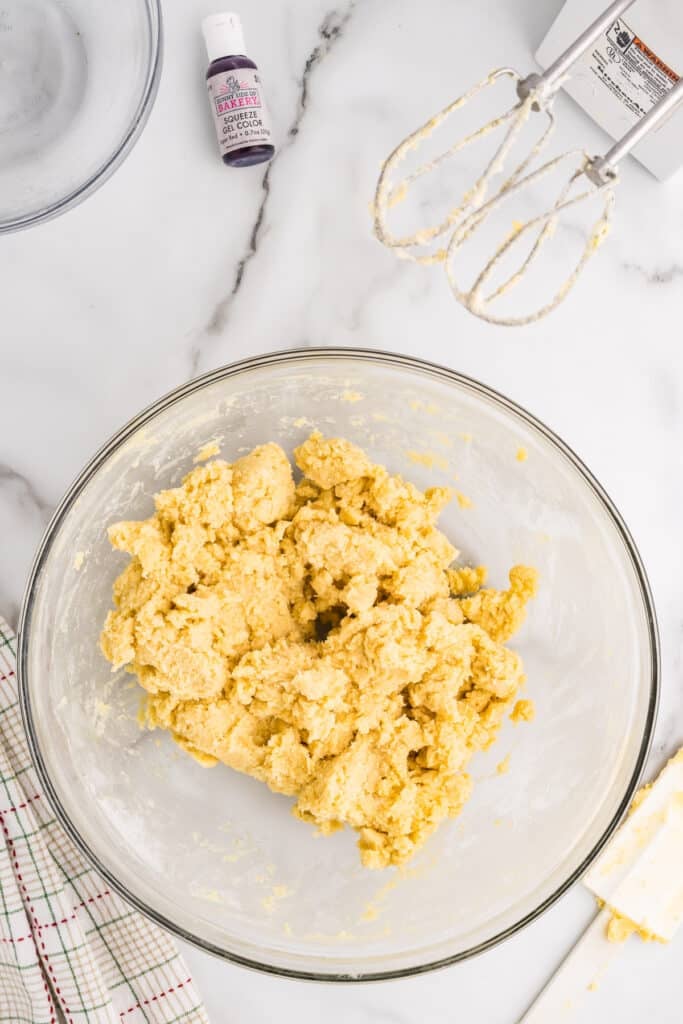
Jump- Step One: In a large mixing bowl, cream together the butter, sugar, egg, almond extract, and vanilla extract. Add in the flour and salt and mix until just combined.
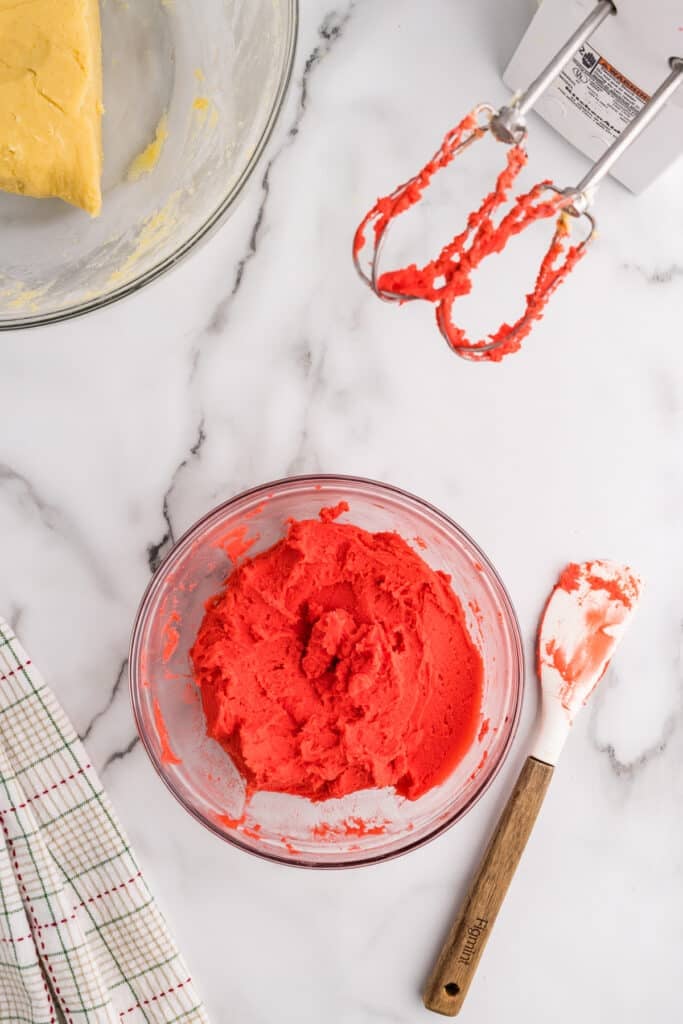
- Step Two: Divide the dough in half. Place one half in a separate mixing bowl. Drop in your red food coloring to one of the halves and use a hand mixer to blend it in.
- Step Three: Use a small cookie scoop to scoop 1 teaspoon of red dough and 1 teaspoon of white dough. Transfer them to a lightly floured work surface. Use the palm of your hand to roll each one into a 2-inch rope.
- Step Four: Bring the two pieces together, side by side, and gently pinch them together and continue rolling them with the palm of your hand until they become one, 4-inch rope. Then, you’re going to gently pinch one end while you twist the other so the colors spiral into candy cane stripes. Shape the end into a hook and repeat with the remaining dough.

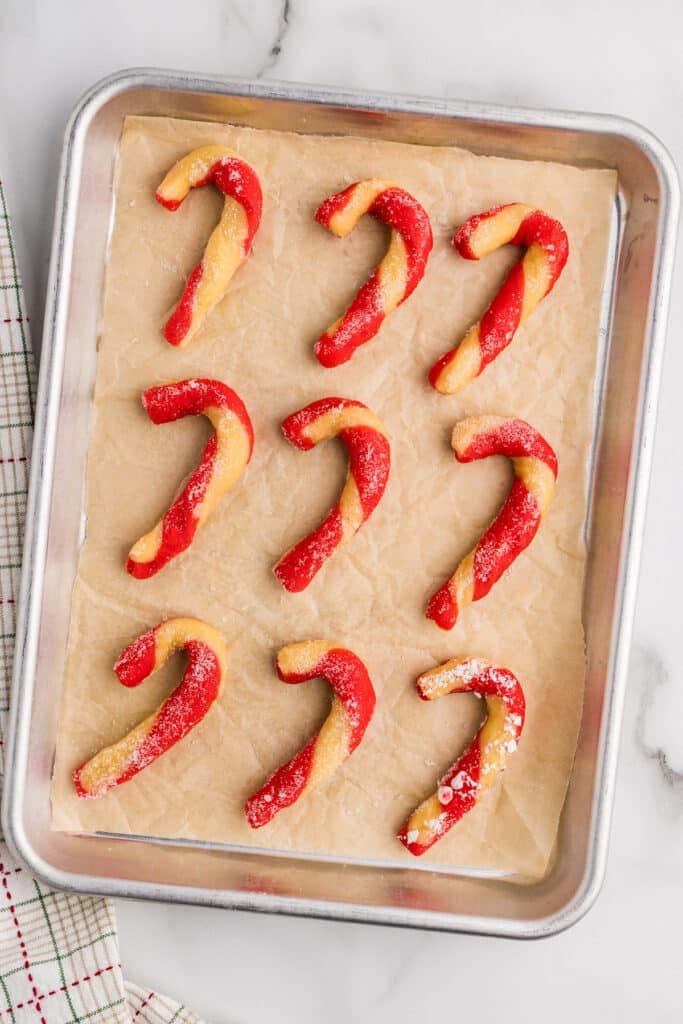
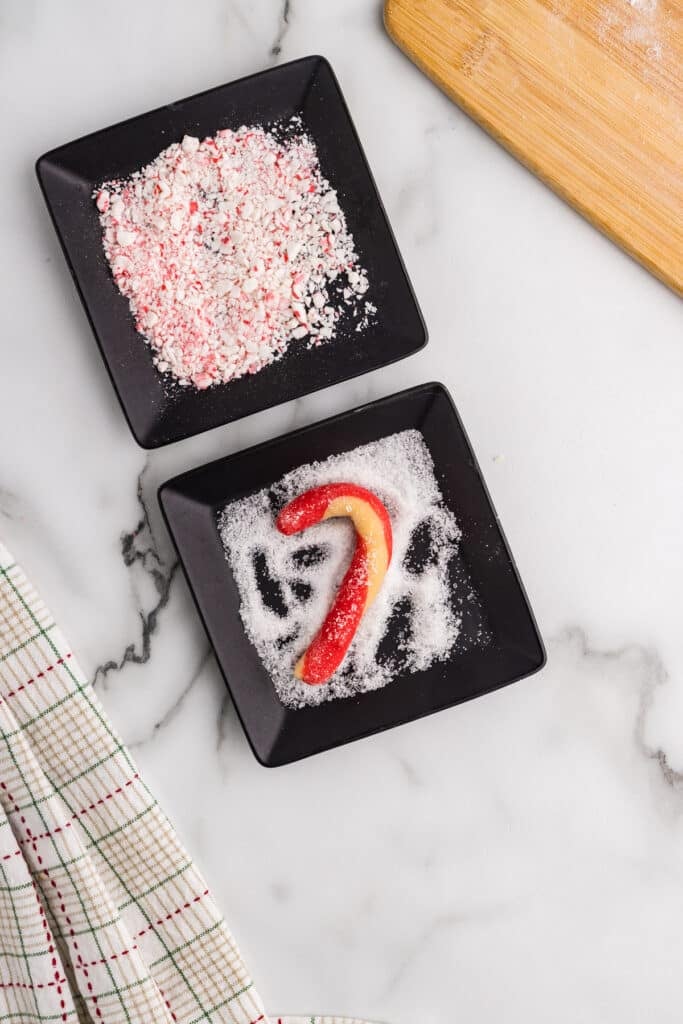
- Step Five: Press each of the candy cane cookies into sanding sugar and place onto a baking sheet. Bake in a preheated 350°F oven for 8-10 minutes until very lightly brown. Let them cool in the pan for 5 minutes. Enjoy!

- I used 1/2 teaspoon of red gel food coloring. Depending on the kind you use, or how dark you want the red will determine how much you add. Liquid food coloring can soften the dough.
- For peppermint flavor, you can swap the almond extract with 1.5 teaspoons of peppermint extract.
- We also used Wilton peppermint crunch sprinkles mixed with the sanding sugar for half of the batch.
- Chill the dough if necessary. If you find your dough is too soft before twisting, chill it in the fridge for a few minutes. This will help with cleaner twists.
- Keep all your ropes the same size. This way all your cookies will be the same size and bake evenly.
- Gentle twists are all you need. If you overdo it or are a bit too rough, you risk breaking the dough.
Storage & Reheating
How to store leftovers
Candy cane Christmas cookies can be kept at room temperature for up to 4 days, which is why they make such great gifts! No need to refrigerate them. Be sure to keep them in an airtight container and separate the layers with parchment paper.
Freezing Instructions
Once the cookies are baked and cooled completely, flash freeze them on a baking sheet and then transfer them to a freezer bag. They can be kept frozen for 2 months and then thawed at room temperature when you’re ready to eat them.

Need more holiday cookie recipes? Try these:
Chocolate Chip Snowball Cookies
Double Chocolate Thumbprint Cookies
Click here to view my collection of 30+ Classic Christmas Cookies.

Candy Cane Cookies Recipe
Ingredients
- 1 cup (226 g) butter softened to room temp
- 1 cup (113 g) powdered sugar
- 1 large egg
- 1½ teaspoon almond extract
- 1 teaspoon vanilla extract
- 2½ cups (300 g) all purpose flour
- 1 teaspoon (4 g) kosher salt
- red food coloring
- white sanding sugar
Instructions
- Preheat the oven to 350°F and line two baking sheets with parchment paper and set aside.
- To a large mixing bowl, add the butter, sugar, egg, almond extract, and vanilla. Use a hand mixer to cream together.1 cup butter, 1 cup powdered sugar, 1 large egg, 1½ teaspoon almond extract, 1 teaspoon vanilla extract
- Add in the flour and salt and mix until just combined.2½ cups all purpose flour, 1 teaspoon kosher salt
- Divide the dough in half, placing half the dough into a small mixing bowl.
- Use the hand mixer to blend red food coloring into half the dough until it reaches the shade you're after.red food coloring
- Lightly flour a board. Use a small cookie scoop to scoop 1 teaspoon of each dough. Roll each into a ball then use the palm of your hand to roll each ball into an approximately 2 inch rope.
- Gently pinch the two ropes together and continue rolling with the palm of your hand until it reaches 4 inches in length.
- Gently pinch one end while twisting the other so the colors form the candy cane stripes. Shape the end into a hook and lay onto the prepared baking sheet. Repeat until out of dough.
- Pour white sanding sugar onto a plate and press each cookie into the sugar and then back onto the baking sheet.white sanding sugar
- Bake for 8-10 minutes or until very lightly brown.
- Remove from the oven and let cool on the pan for approximately 5 minutes.
Notes
- I use salted butter but unsalted can be used.
- How much food coloring you need will depend on which type and brand you use and how dark you want the red to be. I used approximately 1/2 teaspoon of red gel food coloring.
- If you don’t have white sanding sugar, granulated sugar can be used.
- For a peppermint flavor, use 1 1/2 teaspoons of peppermint extract in place of almond extract.
- We also used Wilton Peppermint Crunch sprinkles mixed with the white sanding sugar for half the batch.
- Store leftovers covered at room temperature for up to 4 days.
Nutrition
Nutritional information is an estimate and provided to you as a courtesy. You should calculate the nutritional information with the actual ingredients used in your recipe using your preferred nutrition calculator.
Did you make this recipe?
Tag me on Instagram @melissa_pplates so I can see!Did You Make This?
If you made this recipe, I’d love to know how it went in the comments section below.
You can also tag me on Instagram – @melissa_ppplates or share a pic in the Persnickety Plates Community Facebook group. I love seeing what you’ve tried!