


These super fudge brownies are the same ultra-chocolatey chunks you’d find in the popular Ben and Jerry’s brownie ice cream, with a homemade taste and a rich fudgy texture. Made with just 8 simple ingredients and some good quality chocolate, these are a brownie lover’s dream!

Lately, I’m on a quest to try all the brownie recipes I find. I’ve decided that it’s not about finding the best brownie recipe, because the ultimate chocolate brownies, Starbucks chocolate chunk brownies, peanut butter swirl brownies, and frosted zucchini brownies are all the best and unique in their own way. It’s about adding to my list and making it the best collection of brownies to share with you.
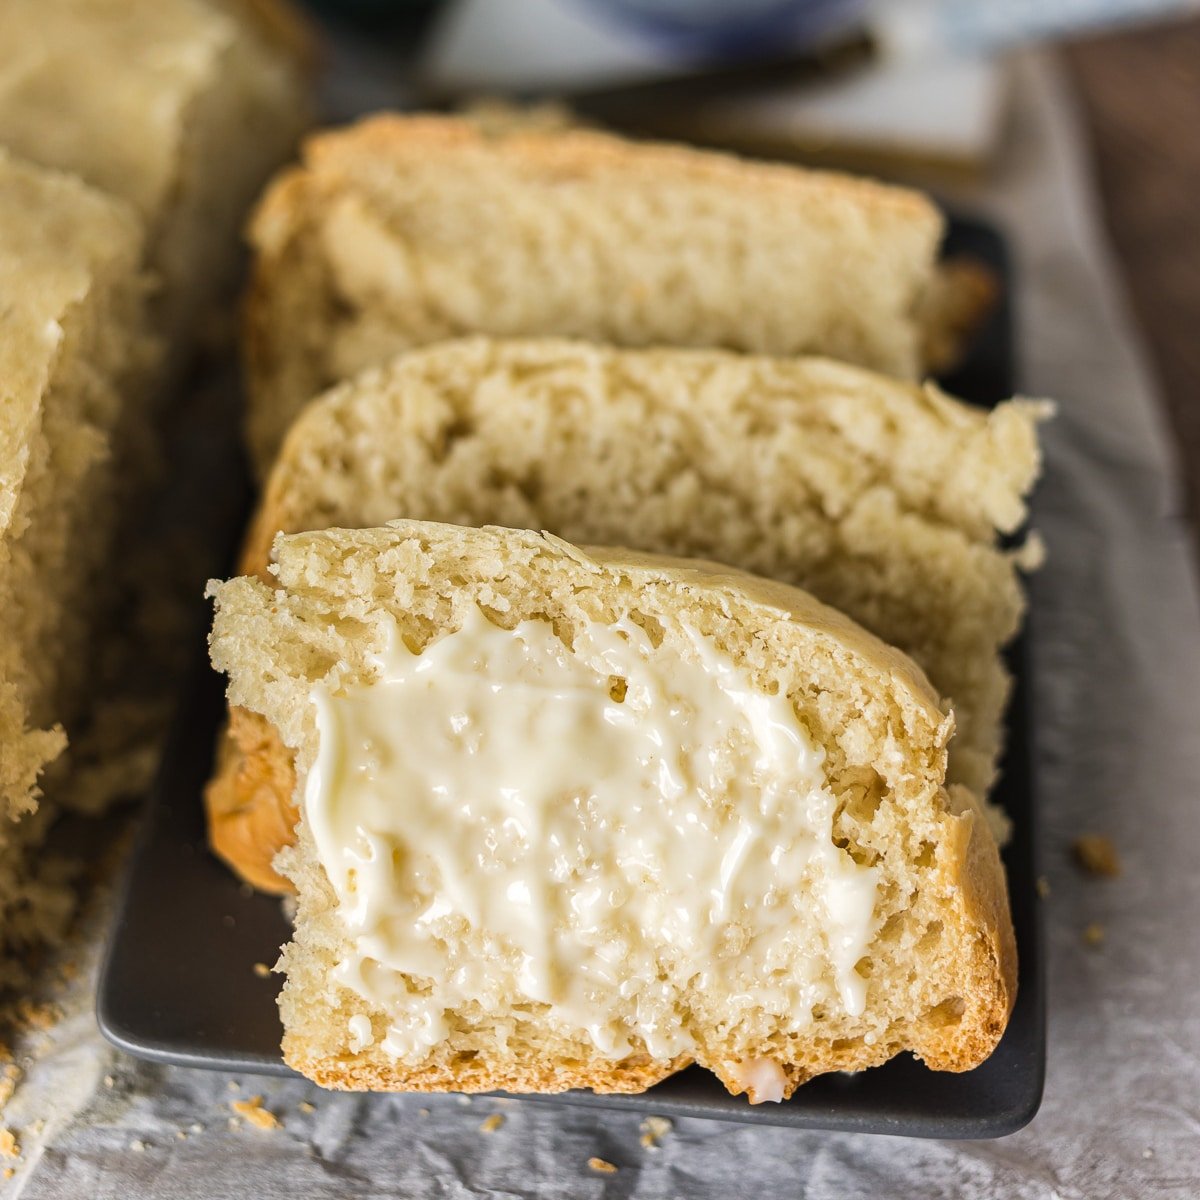
This new one comes from, of all places, a Muppets cookbook called In the Kitchen with Miss Piggy, and it did not disappoint. They’re perfectly fudgy with a crinkly top and so easy to make.
With just 8 ingredients and a double boiler, you’re well on your way to making super fudge brownies that taste exactly like the brownie chunks you’ll find in Ben and Jerry’s brownie ice cream!
Ben and Jerry’s Brownies

Why you’ll love this recipe
- They’re fudgy brownies with that classic crinkly top.
- Serves anywhere from 9-24 people!
- No fancy ingredients needed, just simple baking staples.
- Customizable for adding nuts or extra chocolate!

Helpful Tools
- Double boiler or just use a saucepan & heatsafe bowl, like I do.
- 9×13 baking dish – I always used to use glass but recently have moved to these metal baking pans & really like them. Either way works.
- Spatulas
Ingredients
Below is a list of the ingredients you’ll need to gather to make this recipe, why you need them, and possible substitutions. Scroll all the way down for the full recipe card with measurements.
Jump- Unsweetened chocolate: Use your favorite chocolate bar and break it up into pieces. Guittard, Ghirardelli, or Baker’s chocolate are great options.
- Salted butter: Cut it into cubes for faster melting.
- Large eggs: Bring these to room temperature. They’ll blend easier that way, and it’s a good idea for all ingredients to start at the same temperature.
- Salt and sugar: A balance of flavors. Since we’re using unsweetened chocolate, we’ll need to add the sweetness.
- Vanilla extract: Enhances the flavor of these super fudge brownies even more.
- All-purpose flour: For the best texture, be sure to measure your flour correctly, even if you don’t have a scale.
- Chocolate chips: I use semi-sweet chocolate chips.

How to make Ben and Jerry’s Fudge Brownies
This section shows you how to make this recipe, with process photos showing the steps to help you visualize it. For full instructions, including amounts and temperatures, see the recipe card below.
Jump- Step One: Place a double boiler over simmering water. Add pieces of a chocolate bar and cubed butter to the top and stir frequently until melted and smooth. Remove the melted chocolate from the heat and allow it to cool (but not solidify).


- Step Two: Grab a large mixing bowl and whisk together the eggs and salt until very fluffy and foamy. A 1/4 cup at a time, gradually whisk in the sugar and vanilla. The mixture should be light yellow and airy.
- Step Three: Gently fold in the cooled chocolate until just combined. Do not overmix! Then, gently fold in the flour and chocolate chips. Again, avoid overmixing to keep the batter nice and fluffy.

- Step Four: Pour the batter into the prepared 9×13 pan, lined with parchment paper, and smooth it into an even layer.

- Step Five: Bake in a preheated oven at 350°F for 25-30 minutes. Do not overbake. Let it cool on the counter before slicing. Enjoy!

- This family sized batch of brownies can serve up to 24 people. Or 9 if you’re serving mega brownies!
- Swap the chocolate chips for chopped walnuts. Or use both.
- A plastic knife will give you nice clean cuts without having to wipe between slices.
- You can cool the chocolate in the fridge, just don’t let it harden.
- Leave some of the parchment paper hanging over the sides. You can use this to lift the brownies out of the pan before slicing.
- Do not overbake your Ben and Jerrys brownies. They may look a little “wet” even when they’re done baking, but that’s ok. They’re just fudgy and will continue to set as they cool.
Storage & Leftovers
How to store leftovers
The brownies can be kept at room temperature on the counter, covered, for up to a week. Using an airtight container is important to keep them from drying out.
Freezing Instructions
Wrap the individual brownie squares tightly in plastic wrap. Place them in a freezer bag and they’ll keep frozen for up to 3 months.

Need more brownie recipes? Try these:
Red Velvet Cheesecake Brownies
Coconut Oil Dark Chocolate Brownies
Click here to view my entire collection of brownies and bars.

Ben & Jerry’s Fudge Brownies Recipe
Ingredients
- 4 ounces (113 g) unsweetened chocolate
- ½ cup (114 g) salted butter cubed
- 4 large eggs at room temp
- ½ teaspoon salt
- 2 cups (396 g) granulated white sugar
- 1 teaspoon vanilla extract
- 1 cup (120 g) all purpose flour
- 1 cup (130 g) chocolate chips
Instructions
- Preheat the oven to 350°F and line a 9×13 baking dish with parchment paper with the excess hanging over the side. Set aside.
- To a double boiler over simmering water, break apart the chocolate and add it with the cubed butter, stirring frequently, until melted and smooth. Remove from the heat and let cool.4 ounces unsweetened chocolate, ½ cup salted butter
- While the chocolate is cooling, to a large mixing bowl, add the eggs and salt and whisk together until very fluffy and foamy.4 large eggs, ½ teaspoon salt
- Gradually, 1/4 cup at a time, whisk in the sugar and vanilla. The mixture should be light yellow and airy.2 cups granulated white sugar, 1 teaspoon vanilla extract
- Gently fold in the cooled chocolate until just combined.
- Gently fold in the flour and chocolate chips. Do no overmix, you want the batter to remain fluffy.1 cup all purpose flour, 1 cup chocolate chips
- Pour the batter into the cooled pan and smooth into an even layer.
- Bake for 25-30 minutes or until a toothpick inserted into the center comes out with just a few moist crumbs. Do not overbake.
- Let cool on the counter and then slice with a plastic knife.
Notes
- You can slice the brownies as generously as you’d like – this “family size” batch can serve anywhere from 9-24.
- I add semi-sweet chocolate chips. Chopped walnuts can also be added.
- I recommend using a plastic knife for clean cuts.
- If you need to speed up the cooling of the chocolate, you can place the bowl in the refrigerator, but do not let it solidify.
- Store leftovers covered at room temperature for up to a week, or wrapped tightly and frozen for up to 3 months.
Nutrition
Nutritional information is an estimate and provided to you as a courtesy. You should calculate the nutritional information with the actual ingredients used in your recipe using your preferred nutrition calculator.
Did you make this recipe?
Tag me on Instagram @melissa_pplates so I can see!Did You Make This?
If you made this recipe, I’d love to know how it went in the comments section below.
You can also tag me on Instagram – @melissa_ppplates or share a pic in the Persnickety Plates Community Facebook group. I love seeing what you’ve tried!


This is the best brownie recipe I have ever made.
Yay =) It’s a good one!
I really like the light and airy texture of the resulting brownie. The only thing I want to change is that it’s still liquidy on the inside even after baking for 23~ minutes and cooling for 30. Does 2 minutes really make that much of a difference, or should I be keeping it in for an extra 5ish minutes or adding more flour or something? Pretty sure everything else in the recipe was exactly the same as above.
Have you tested your oven temp recently? I know mine runs about 5° lower than it says. That could contribute to it, but also giving it an extra 3-5 minutes would prob be ok.