


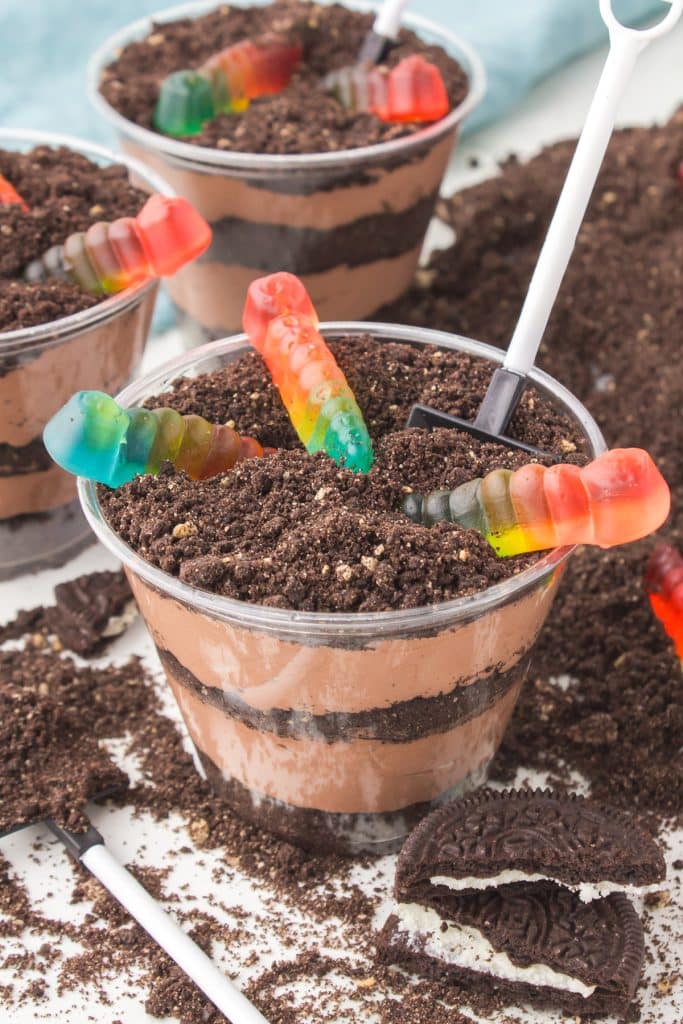
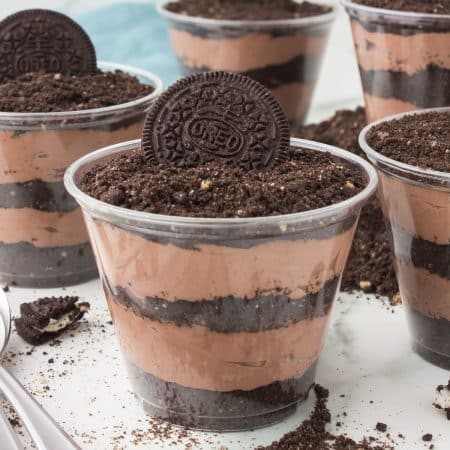
Dirt cup dessert is a fun way to serve a rich, creamy, chocolate pudding! Much like a trifle or parfait, it is layered with crushed Oreo cookies to look like dirt then finished with gummy worms on top! It’s a fun and festive dessert that everyone loves. Serve it in individual cups or a bucket for added effect!

Dirt pudding with Oreos is a creamy, chocolaty, and fun dessert, especially when served in cups that are adorably festive for pool parties, birthday parties, beach days, and even Halloween parties. I mean who doesn’t love eating a dessert that looks like worms and dirt?!
Layers of rich, chocolate cheesecake pudding and Oreo crumb “dirt” make this a quick and easy way to chocolate heaven. With each of the layers in every spoonful, it’s easy to see why it never lasts long in our house.
They’re the chocolate version of my Golden Oreo sand pudding and they’re just as fun for the kids to make.
Since they are a no-bake dessert that doesn’t even require any cooking of the pudding, it’s a recipe that kids can do all on their own.
Serve it in a bucket for sharing or individual cups for easy serving, it’s up to you!
Why you’ll love Oreo Dirt Pudding
- Super Simple to Make – There’s no baking or cooking involved and a total of 30 minutes from start to finish. It is a quick and easy kid-friendly dessert everyone can take part in!
- Adorable Presentation – Whether you choose to use a bucket for a fun presentation or clear cups to see the pretty layers, you can’t go wrong! The worms are not a must, but they certainly are a bonus!
- Customizable – Make it a large pudding to share, individual servings, or turn it into a cake! There are many fun ways to enjoy Oreo dirt cups!
Helpful Tools
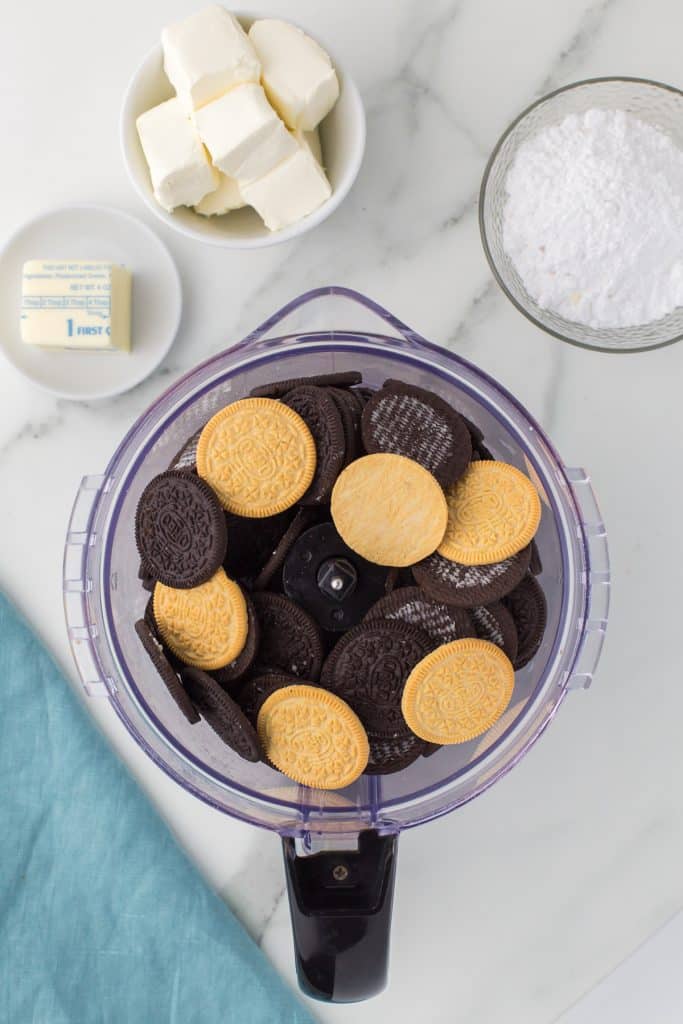
- Food Processor – to crush all of the cookies. Or a ziptop bag & rolling pin will get the job done!
- Hand Mixer – It’s easiest to mix the cream cheese with an electric mixer but the pudding will do fine with just a whisk.
- Mini Shovel Spoons – How cute are these!?
- Sand Buckets – These are usually readily available at the dollar store, but if it’s off-season ordering is always an option.
- Clear Plastic Cups – If you go the individual cup route, shown are 9 ounce plastic cups.
- Mixing Bowls – You’ll need a few mixing bowls to prep the layers for the sand pudding.
Ingredients
Below is a list of the ingredients you’ll need to gather to make this recipe, why you need them, and possible substitutions. Scroll all the way down for the full recipe card with measurements.
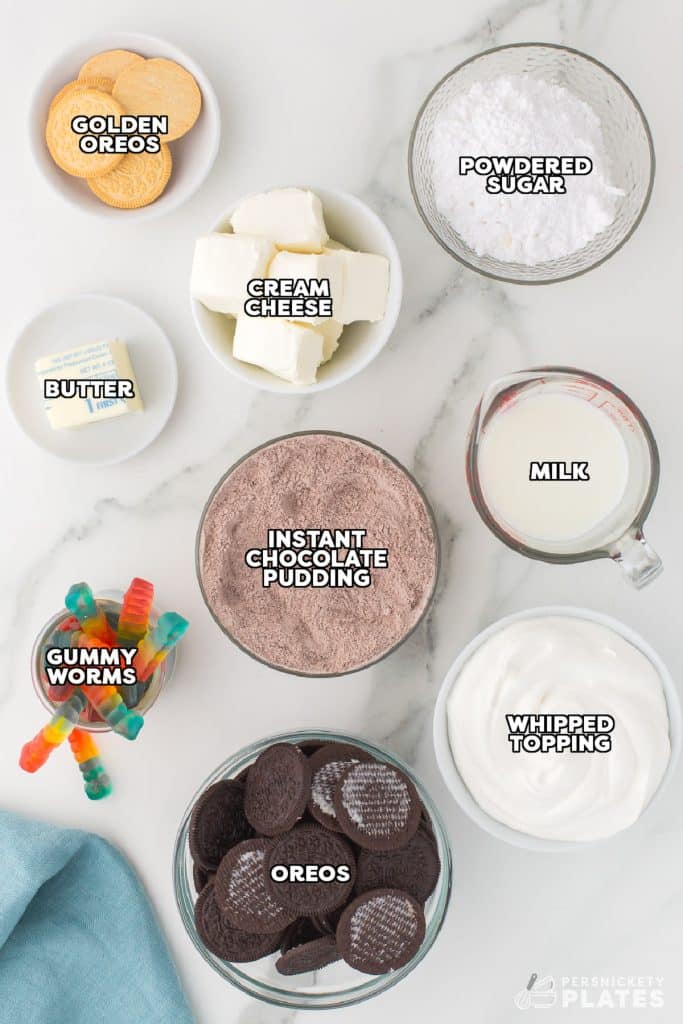
Jump- Classic Oreos – The crushed Oreos look just like dirt!
- Golden Oreos – You just need a couple of golden Oreos to mix in and make the dirt look more realistic. This is optional, but effective.
- Cream Cheese – Softened to room temperature.
- Butter – Also softened to room temperature.
- Powdered Sugar – To add the sweetness without the grittiness of granulated sugar and to help stabilize the pudding mixture.
- Instant Chocolate Pudding Mix – You’ll need two 3.9 oz packages of instant chocolate pudding mix.
- Milk– I use 2% because that’s what I usually have on hand. You can use whatever you’ve got on hand.
- Whipped Topping – Either cool whip or any sort of whipped topping you prefer. I have a simple homemade Cool Whip recipe I love to use. If using a store-bought cool whip, make sure to thaw it ahead of time.
How to make Dirt Cup Dessert
Making dirt pudding with Oreos is easy since it’s a no-bake treat, but it requires a little time to assemble!
This section shows you how to make this recipe, with process photos showing the steps to help you visualize it. For full instructions, including amounts and temperatures, see the recipe card below.
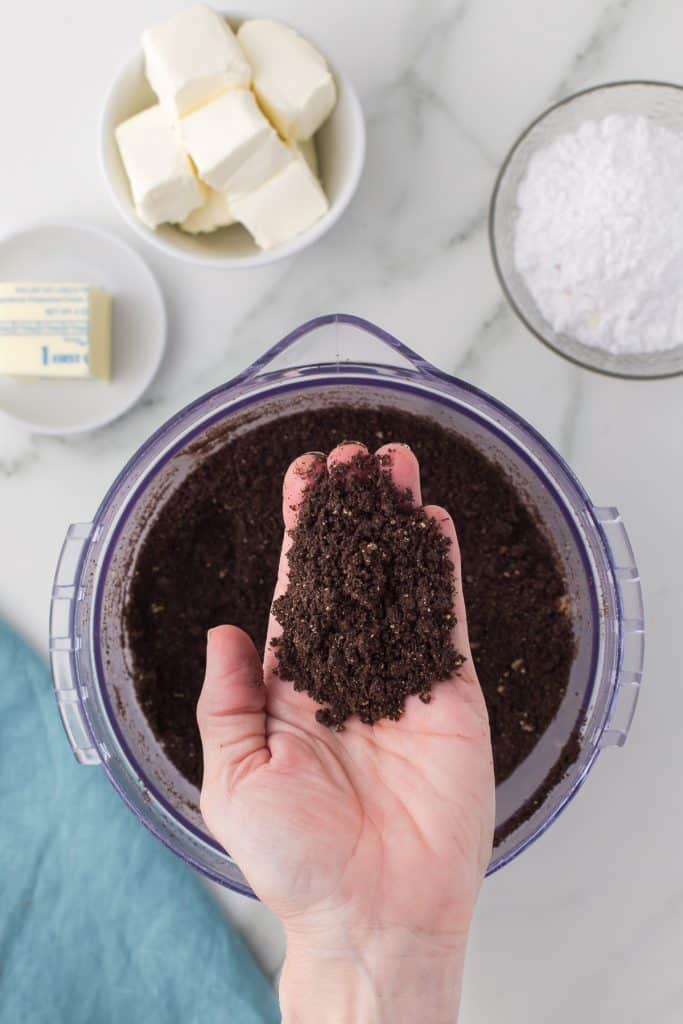
Jump- Step One: Scrape out the center of the Oreos and crush them in a food processor until sand-like. This step is optional, to some, but I find this dessert to have enough sugar, so I scrape out the centers. Use the entire package of Classic Oreos with a couple of golden Oreos to make the dirt realistic looking until you have a dirt-like texture.
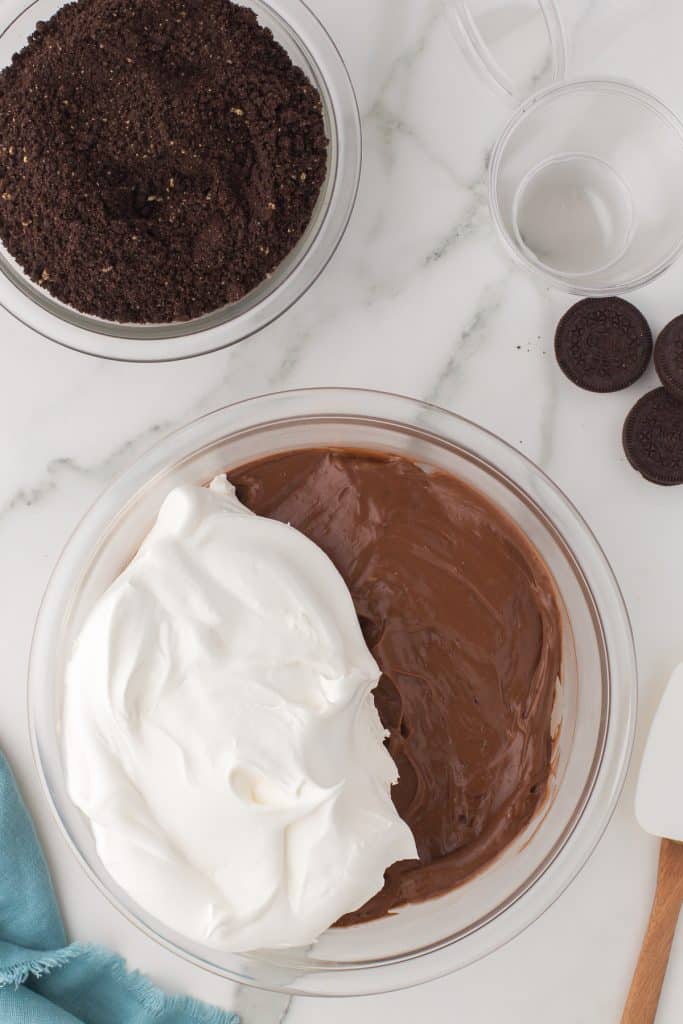
- Step Two: In a large bowl, beat the softened cream cheese, butter, and powdered sugar until smooth. This tangy, cheesecake-ish layer helps to thicken the pudding and gives it an extra creamy consistency.
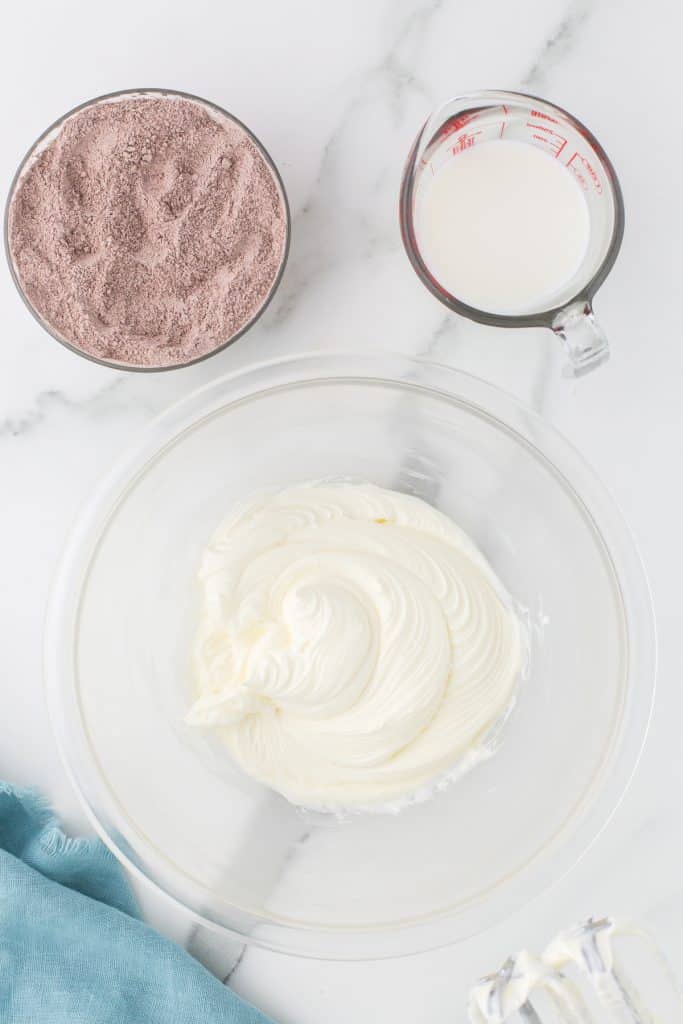
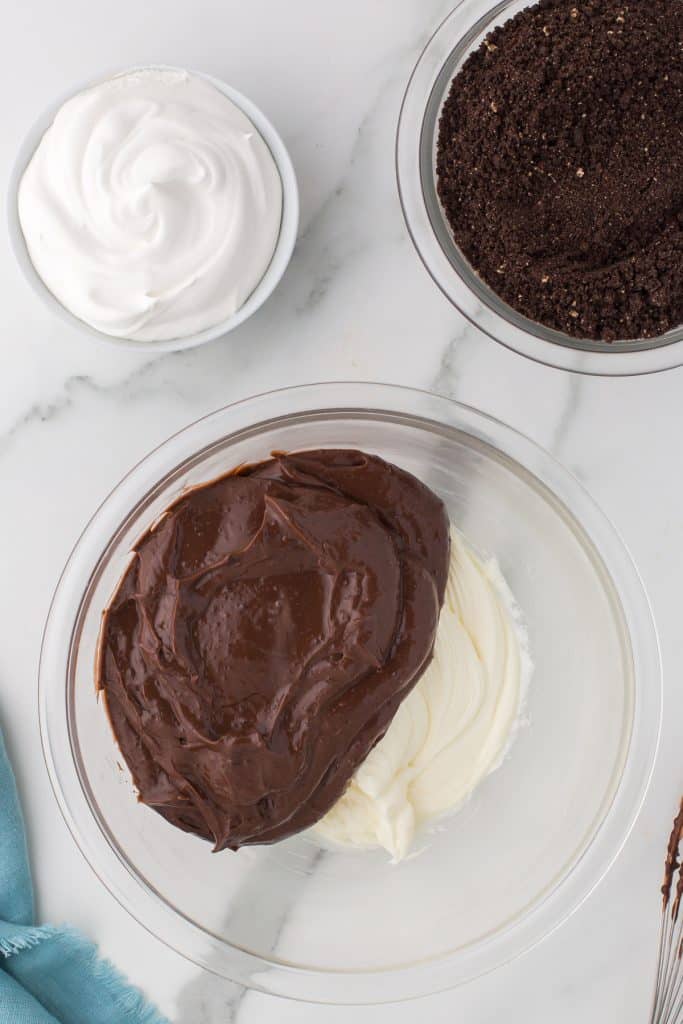
- Step Three: In a separate bowl, whisk the milk and pudding mixes together until the lumps are gone. Then, add the pudding mixture to the cream cheese mixture and mix to combine. Gently fold in the cool whip.
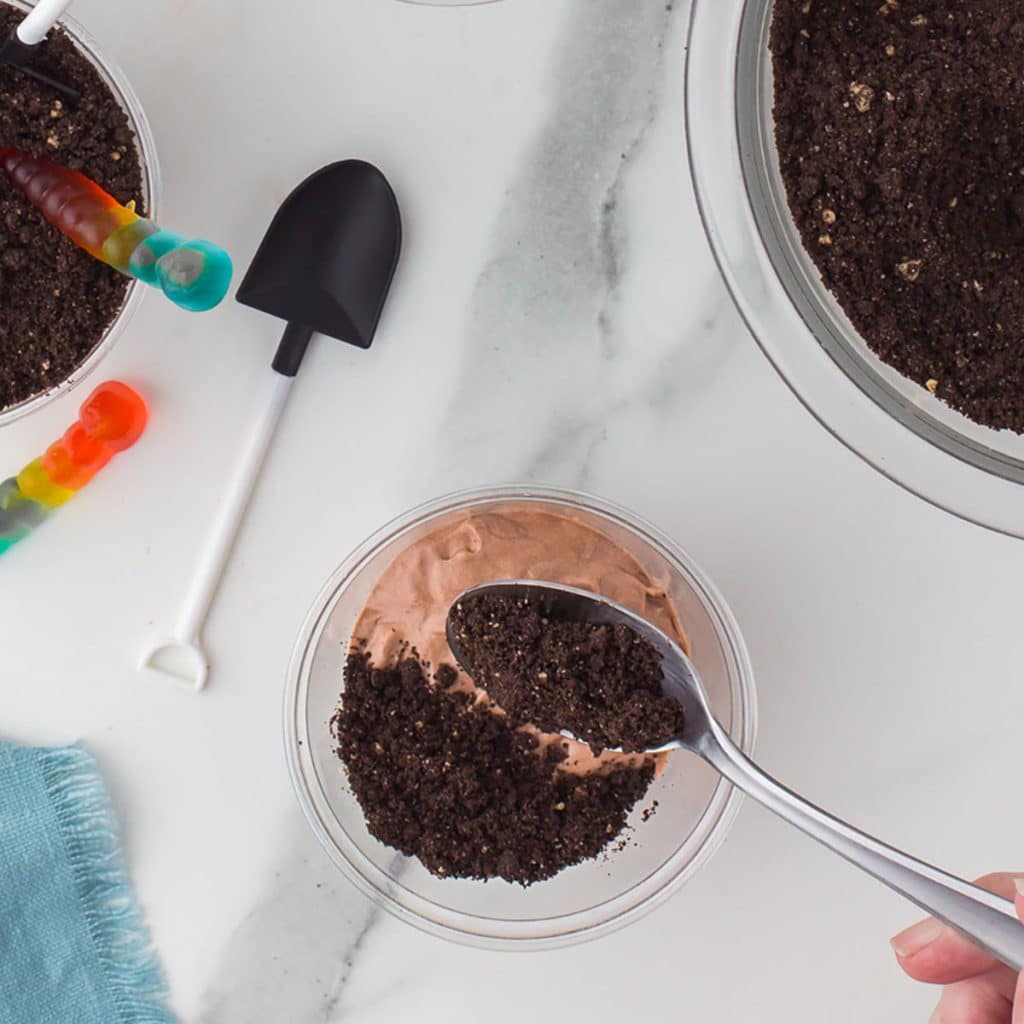
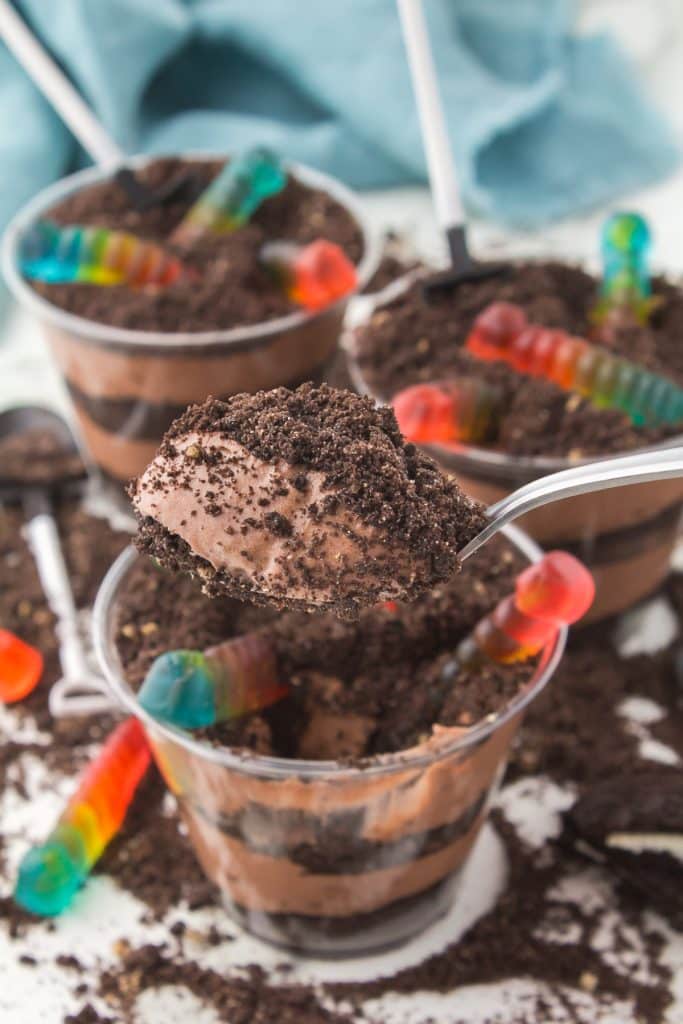
- Step Four: Set out your 9-ounce plastic cups and add 1/4 cup of pudding followed by a layer of cookie crumbs. Do one layer at a time, all cups at the same time, that way you don’t use more in one cup and less in another. Do this until your pudding and crumbs are gone. Finish with crumbs on top and add gummy worms and mini shovels for a fun effect.
That’s it! You’re ready to serve your dirt dessert cups and enjoy.
- If using a bucket, it should be about 7.5 inches. Follow the same layering pattern, making sure to finish with the Oreo crumbs.
- To make crumbs without a food processor, place the cookies in a sealed zip-top bag (let the air out) and use a rolling pin to crush the cookies into the sand.
- For a fun twist and a combination of chocolate and golden sand dessert cups, use French vanilla pudding with the chocolate Oreos for a different black-and-white layered presentation.
How to store Dirt Cup Dessert
Dirt pudding should be kept covered in the fridge until you’re ready to serve it and best served the day it’s made. Any leftovers can be kept in the fridge for up to 5 days.
The cookies will become soggy, but they’ll still taste great. You can always add a sprinkle of fresh cookie crumbs to add a bit of new crunch!

FAQs
Absolutely. If you don’t need to make all 10 servings of Dirt Cup dessert, by all means, cut the entire recipe in half.
These dirt pudding cups are great for making ahead. Just don’t assemble anything until just before serving. Keep the crumbs and the pudding mixture separate in airtight containers or bowls covered in plastic wrap. Otherwise, the crumbs will get soggy.
Actually, no! If you want to save a bit of time, some people prefer to mix most of the cookie crumbs into the pudding and add all of it to the cup. Then, finish with a top layer of extra cookie crumbs for the dirt.
Dirt Chocolate Pudding Recipe
Need more no-bake desserts? Try these:
Click here for my entire collection of dessert recipes.
Oreo Dirt Pudding Cups
Ingredients
- 13.29 ounce Classic Oreos centers scraped out
- 3 Golden Oreos centers scraped out
- 8 ounces cream cheese at room temperature
- ¼ cup unsalted butter
- ⅔ cup powdered sugar
- 7.8 ounces instant chocolate pudding mix two 3.9 ounce boxes
- 2 ¾ cup milk I use 2%
- 12 ounces whipped topping thawed
Instructions
- Scrape out the center cream in the Oreos.13.29 ounce Classic Oreos, 3 Golden Oreos
- In a food processor, combine the classic Oreos and the golden Oreos & crush until sand-like.
- In a large bowl, using a hand mixer, cream together the softened cream cheese, butter, and powdered sugar until smooth.8 ounces cream cheese, 1/4 cup unsalted butter, 2/3 cup powdered sugar
- In another large bowl, add the milk and pudding mixes. Using a whisk, mix until it thickens and all the lumps are gone.7.8 ounces instant chocolate pudding mix, 2 3/4 cup milk
- Add the pudding mixture to the cream cheese mixture and combine.
- Gently fold in the whipped topping until evenly combined.12 ounces whipped topping
- To make dessert cups – Layer into 9 ounce plastic cups – using approximately 1/4 cup of pudding between each layer of cookie crumbs, repeating until out of both. Add gummi worms and mini shovels for fun effect.
- To make a dirt bucket – Layer into a bucket – "dirt" crumbs, pudding, crumbs, pudding, etc. making sure you end with crumbs.
- Optional toppings: gummy worms, candy flowers, etc.
Notes
- Recipe should make approximately ten 9 ounce layered pudding cups OR one large (7.5″) bucket.
- If you don’t have a food processor, place the cookies into a large zip top bag and crush them with a rolling pin.
- If making ahead of time, keep components separate until ready to serve.
- Once assembled, keep leftovers covered in the fridge for up to 5 days.
Nutrition
Nutritional information is an estimate and provided to you as a courtesy. You should calculate the nutritional information with the actual ingredients used in your recipe using your preferred nutrition calculator.
Did you make this recipe?
Tag me on Instagram @melissa_pplates so I can see!Originally published July 17, 2013


Dirt cake is one of my favorite summer desserts! So fun and delicious!
Freakin’ yum. And how cute you put them in buckets, love it!
I LOVE the touch of the bucket. Makes it a bit more summery. It’s so hot here!! I think the Midwest is getting our cool down on Friday night. I’m really sick of my make up melting off of my face just while I walk the dog around the block.
This is the best looking dirt I’ve ever seen! This sounds delicious and I love that you served it in a bucket, pail and all. So cute!