

This post may contain affiliate links meaning if you buy from them, I will make a few pennies, at no cost to you. See disclosure here.
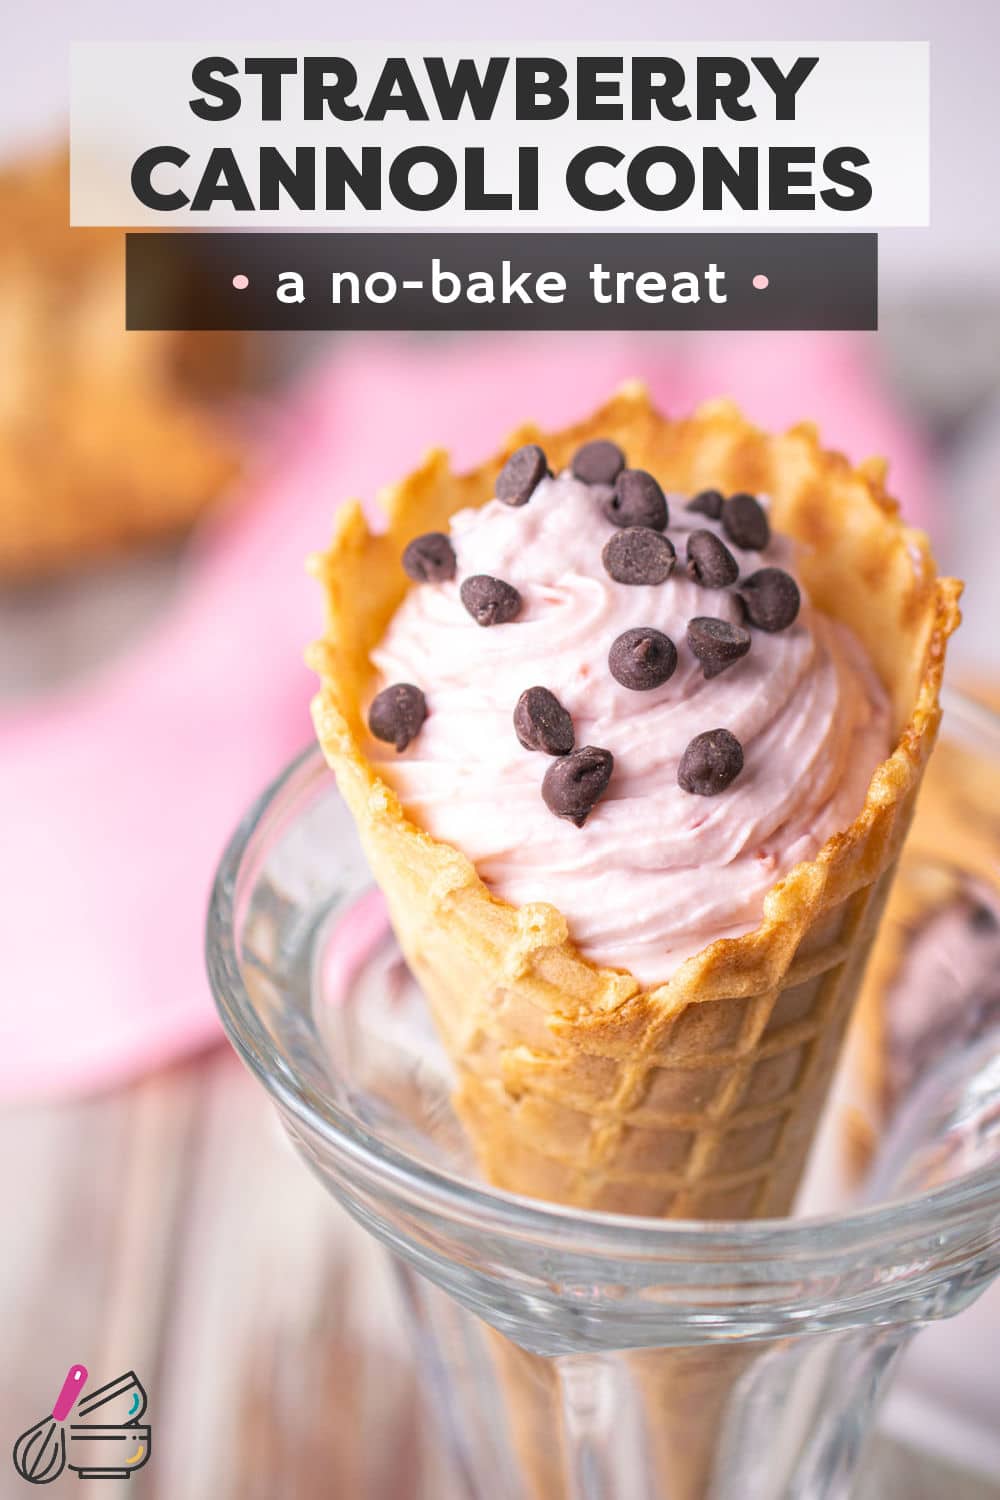
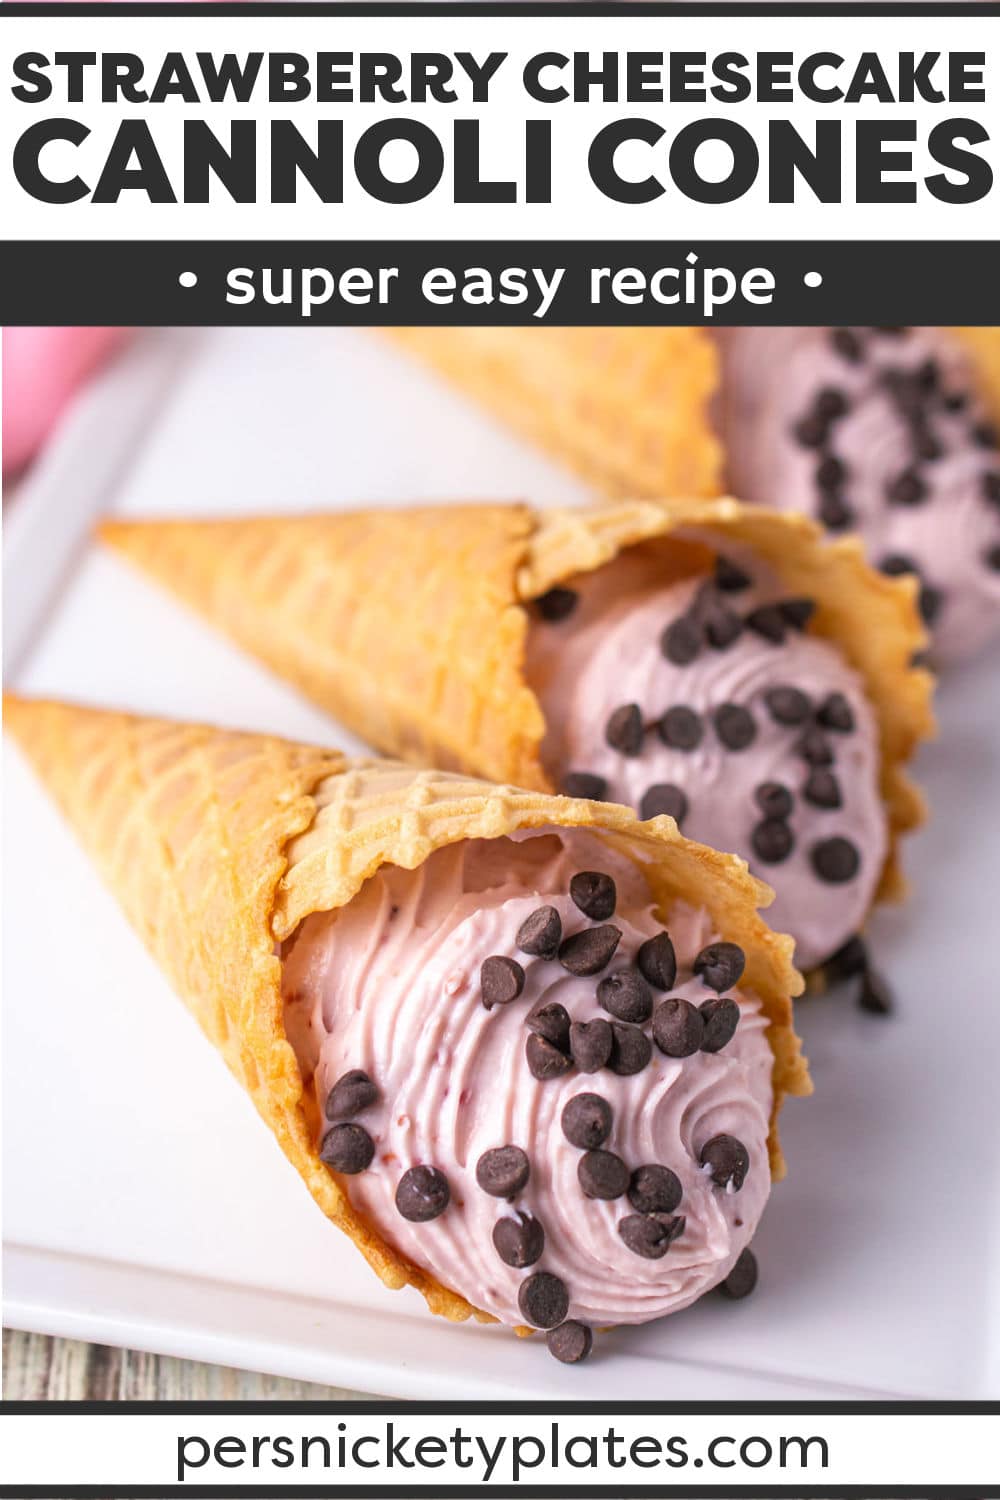
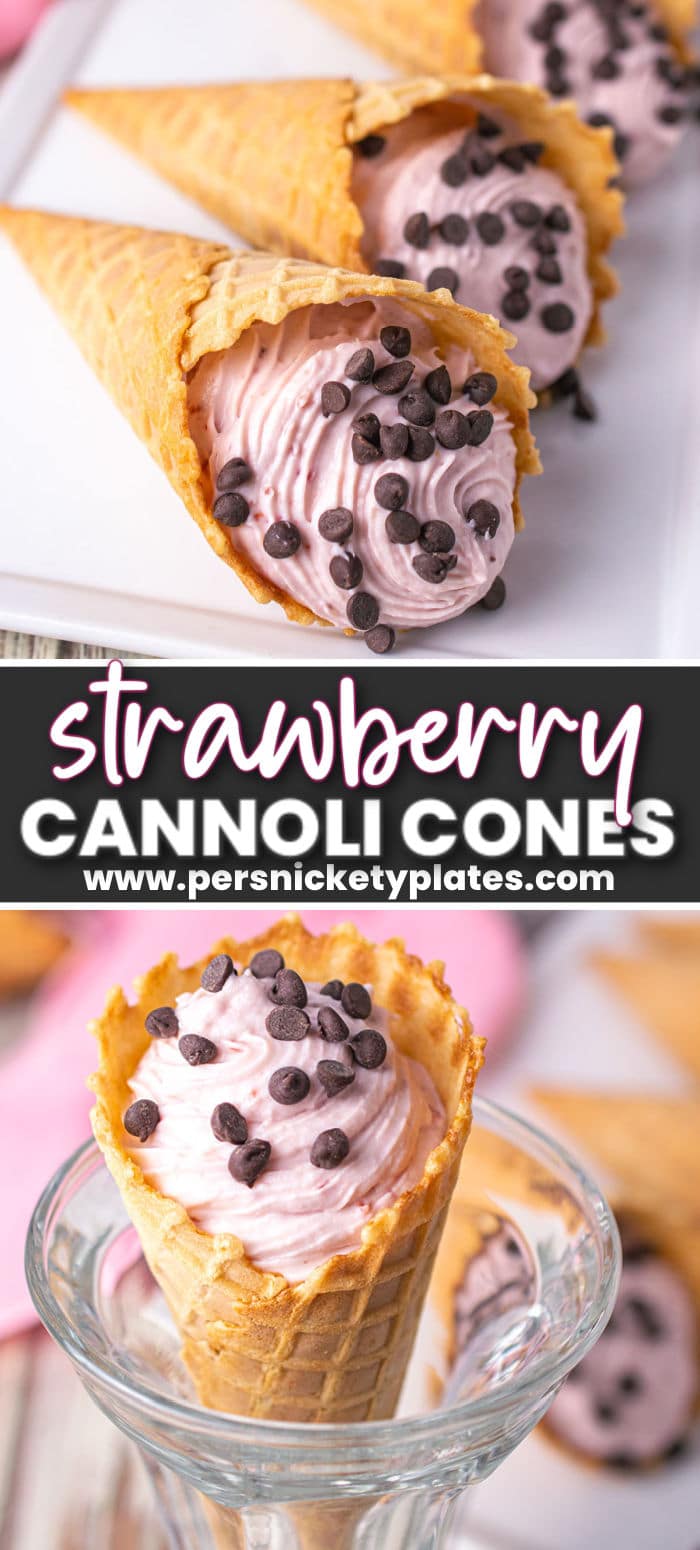
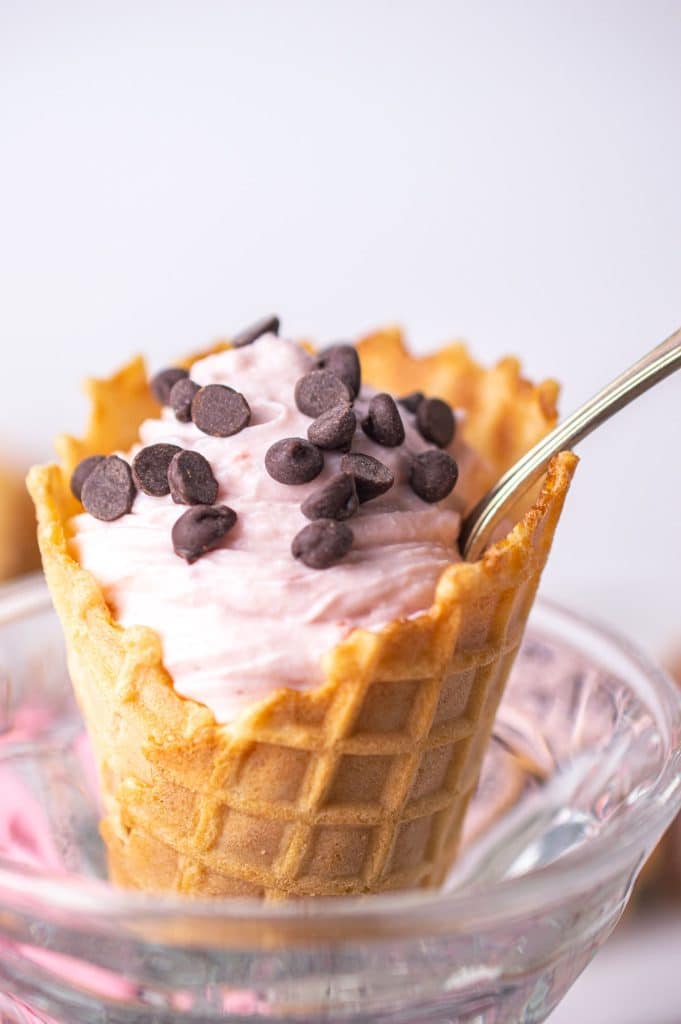
These strawberry cannoli cones are a fun twist on traditional cannoli that everyone will love! Waffle cones replace cannoli shells and are then filled to the brim with a sweet ricotta cheesecake filling that’s rich, delicious, and irresistible!

Cannoli Cheesecake Cones
When the craving for homemade cannoli strikes and I don’t even have time to make my favorite cannoli poke cake, these strawberry cannoli cones are easy to make and have the best flavor!
They are a shortcut version of classic cannoli because we are skipping both making and frying dough and are using waffle cones instead! You will be amazed at how similar the taste and texture are while being fast and easy to make.
The outer shell is crunchy, the filling sweet, smooth, and creamy and it’s a lot less work!
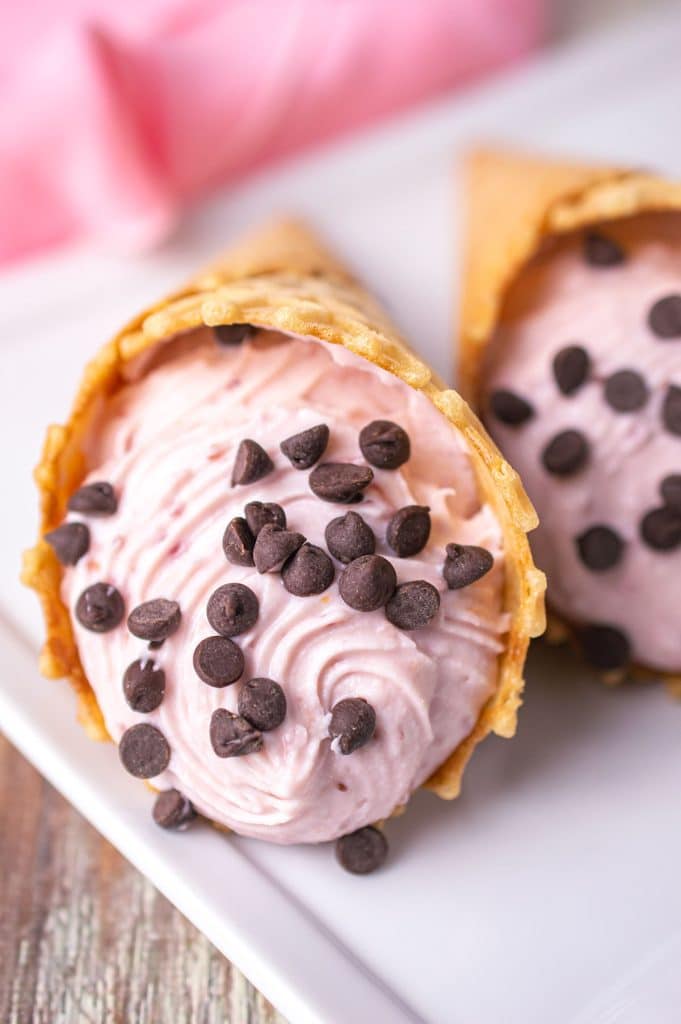
All ages love these cannoli cheesecake cones and they are perfect to serve at parties. While I love these topped with mini chocolate chips, you could serve them with a variety of toppings so everyone can customize their cone.
Plus, it’s a no-bake dessert which may just be my favorite type to make including chocolate and peanut butter eclair dessert and no bake chocolate lush!
Why you’ll love Strawberry Cannoli Cones
Simplified – Traditional cannoli while delicious can be a bit of a hassle to make! These shortcut cannoli cones ensures you still get that delicious creamy filling but the crunchy outer shell is a sweet waffle cone.
Easy to make – Because we are skipping homemade dough and deep frying, strawberry cannoli cones can be made whenever the craving strikes!
Party perfect – These quick and budget-friendly cannoli cheesecake cones are great for any occasion year-round. Holidays, birthdays, a picnic dessert, it all works!
Irresistible – The strawberry cannoli filling is so creamy and fluffy that you may just eat it by the spoonful! Plus you can customize it how you like with some additional chocolate chips, sprinkles, or even nuts.
Equipment you’ll need
- Hand Mixer
- Mesh Strainer – To drain the ricotta cheese.
- Immersion Blender – if you don’t have an immersion blender, a regular blender can be used, just let the strawberry mixture cool a bit before blending.
- Piping bag & tips
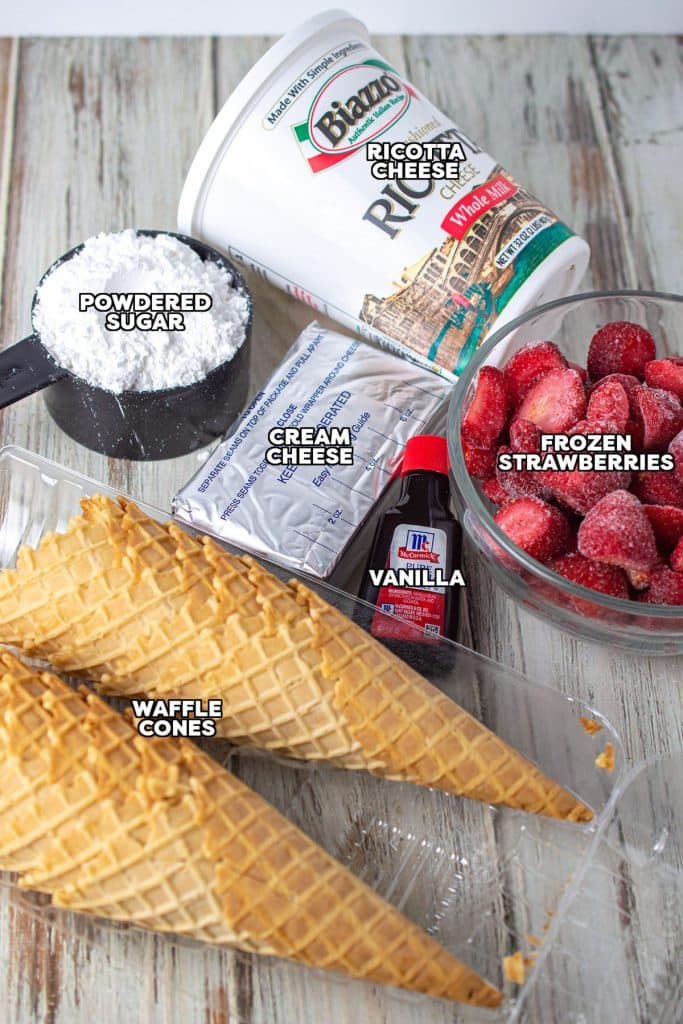
Ingredients
Below is a list of the ingredients you’ll need to gather to make this recipe. Scroll all the way down for the full recipe card.
- Frozen Strawberries – You will need 12 ounces of frozen strawberries. Find them in the freezer section at your grocery store.
- Powdered Sugar – This is what helps keep our cannoli filling light and fluffy!
- Cream Cheese – Plan accordingly as this does need to be softened to room temperature. You could use mascarpone if you do not have cream cheese, your filling will be less tangy, though.
- Ricotta Cheese – For best results and creaminess, use full-fat whole milk ricotta cheese that has been drained. This is something you can do hours ahead. Just place the ricotta in a cheesecloth over a bowl and allow it to drain for up to 8 hours in the fridge.
- Vanilla Extract – Pure vanilla extract for the best taste. Sometimes the artificial stuff has a strong alcoholic flavor to it.
- Waffle Cones – Waffle cones are my preference in these cannoli cones! They are larger, higher in sugar, and melt in your mouth. You can use sugar cones though if you want.
- Chocolate Chips – Optional but strawberries and chocolate really do pair so well together.
How to make Strawberry Cannoli Cones
- Step One: Place frozen strawberries with the 3 Tbsp powdered sugar in a small saucepan and cook over low-medium heat until softened. Pour mixture into a bowl and use an immersion blender to puree, then cool mixture in the freezer for 10 minutes.
- Step Two: Make your cheesecake filling by first beating your softened cream cheese with a hand mixer until smooth, add in vanilla extract and beat until smooth. Next, add your drained ricotta and remaining powdered sugar. Beat until blended together.
- Step Three: Add cooled strawberry puree to the creamy ricotta mixture and beat until combined. Cover and place in the refrigerator for 15 minutes.
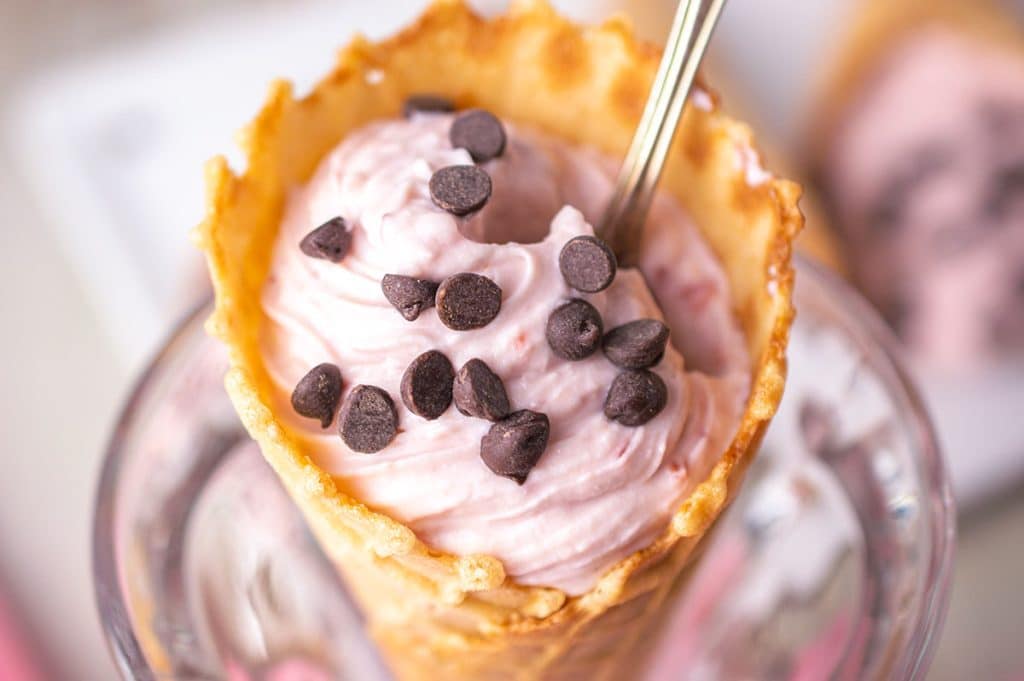
- Step Four: Assemble your cannoli cones! Transfer the mixture to a pastry piping bag fitted with a large tip, or just a large zip-top bag with the very tip snipped. Pipe into your waffle cones, top with mini chocolate chips, and enjoy!

Tips & Suggestions 🍓
- Ricotta must be drained: Place ricotta in a large mesh strainer placed over a large bowl. Cover ricotta with plastic wrap then place two heavy cans on top of it. Drain in the fridge for a few hours up to overnight. You can also squeeze out the moisture in a cheesecloth.
- Blending options: You can use a regular blender if you do not have an immersion blender just be sure your strawberry mixture is cooled before blending. A hand masher may work, but the blender will have the smoothest results.
- Dip cones in chocolate: Traditional cannoli is often dipped in chocolate and it makes the perfect pair to dip your waffle cannoli cones into chocolate and then fill with the strawberry filling!
- Sugar cones: Use smaller sugar cones to serve a larger crowd. Everyone will love your ice cream cone cannoli!
- Serve immediately: If the cannoli filling sits in the cone for too long, the cone will be soggy. Plan accordingly!
- Perfect for any occasion: Serve these cannoli cones at any festive occasion including birthday parties, holidays, baby showers, summer cookouts, or even just when I need something sweet and it’s Monday!
How to store leftovers
How long does the filling last in the fridge?
The filling can be kept in an airtight container in the refrigerator for 1 – 2 days.
Can I freeze leftover cannoli filling?
No, the texture will change when it thaws.
FAQs
What can I use in place of ricotta?
Unfortunately, you can’t substitute the ricotta. You could try making this berry cheesecake fluff with cream cheese and whipping cream and fill your cones with that if you can’t find ricotta.
Do I have to drain the ricotta?
Yes, ricotta is naturally a very moist cheese. If you use it straight from the container your cannoli cheesecake cones will be too moist.
Can I make these strawberry cannoli cones in advance?
After the strawberry cannoli cones are assembled you need to serve them immediately! Otherwise, your cannoli cones will get too soggy and soft.
You can make the filling ahead of time though and store it in the refrigerator for 1- 2 days.
What additions or variations do you suggest?
- For additional flavor add some grated orange or lemon peel to the ricotta mixture.
- Cinnamon would also be delicious!
- Add chocolate chips to the filling or swap out the chocolate chips for chopped pecans, almonds, pistachios, and sprinkles.
- You could also try a different frozen fruit, like raspberries.
Need more dessert recipes? Try these:
Click here for my entire collection of dessert recipes.

Strawberry Cannoli Cones
Ingredients
- 12 ounces frozen strawberries
- 1 ¼ cup powdered sugar + 3 Tablespoons, divided
- 8 ounces cream cheese softened to room temperature
- 1 ½ teaspoon vanilla extract
- 32 ounces ricotta cheese drained
- 8 waffle cones
- mini chocolate chips optional
Instructions
- To a medium saucepan over medium-low heat, add the frozen strawberries and 3 tablespoons of the powdered sugar. Heat until softened, about 5 minutes, stirring often.
- Remove the pan from the heat, pour the mixture into a bowl and use an immersion blender to puree the strawberries.
- Place the bowl in the freezer to cool for approximately 10 minutes.
- While the strawberry mixture is cooling, in a large mixing bowl, use a hand mixer to beat the cream cheese on high speed for 30-45 seconds or until smooth.
- Add in the vanilla extract and mix until combined.
- Next, add the drained ricotta and 1 ¼ cups of powdered sugar.
- Beat on medium speed for approximatey 1 minute. (If you are still waiting for the strawberry puree to cool, place the ricotta mixture into the fridge.)
- Add the cooled strawberry puree to the ricotta mixture and beat on medium until combined.
- Cover and place in the fridge to chill for at least 15 minutes.
- When you are ready to serve, transfer the mixture to a pastry bag fitted with a large tip, or just a large zip top bag with the very tip snipped.
- Pipe the filling into cones, top with mini chocolate chips and enjoy!
Notes
Nutrition
Nutritional information is an estimate and provided to you as a courtesy. You should calculate the nutritional information with the actual ingredients used in your recipe using your preferred nutrition calculator.


Can’t wait for the recipes!!