


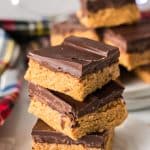
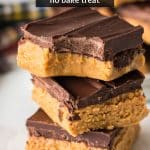
These no bake chocolate peanut butter bars have all the flavors of peanut butter cups in the form of a dessert bar made with just 5 ingredients! With no oven required, these rich and decadent dessert bars come together quickly and easily for the tastiest anytime treat.

Peanut Butter Bars
If you’ve been around for a while, you’ll know how much I love the combination of peanut butter and chocolate.
Peanut butter blossoms, buckeye balls, and peanut butter brownies are just a few of many recipes on the blog where those two flavors are at the forefront.
And, if you’re new here and love the combination as much as I do, well, not only are we going to be fast friends, but you’re going to LOVE these no bake chocolate peanut butter bars as much as I do!
Also known as lunch lady peanut butter bars (though I never saw anything like these in my lunch rooms…), they’re super rich and decadent and so easy to make.
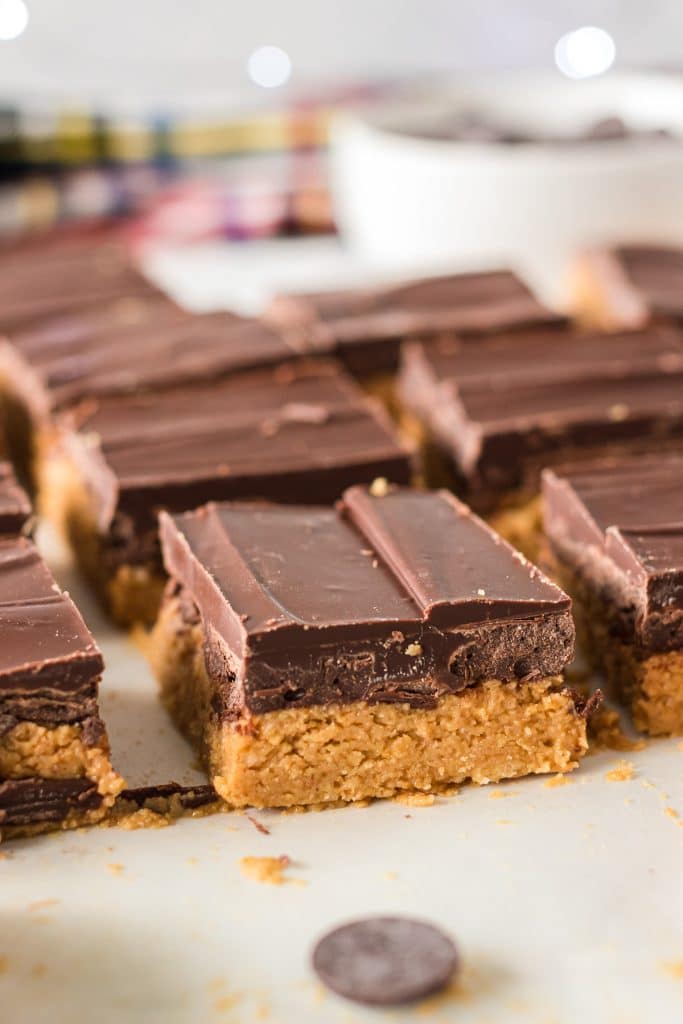
Starting with a base of creamy nut butter, powdered sugar, and graham cracker crumbs, they’re moist yet not sticky and hold their bar shape so well. Then, they’re topped with a solid layer of melted chocolate that cracks when you bite into it then immediately melts in your mouth.
The best part is, this sweet treat is made without turning on the oven!
Why we love this recipe
- Quick and easy prep – This is a great no bake recipe for both kids and adults. There is no hot oven involved, so older kids can even take the lead.
- Year-round dessert – A staple dessert during the winter holidays to summer vacation when you don’t want to heat your kitchen!
- Serves a crowd – Cut the pieces as big or as small as you’d like for as many people as you’d like to serve. Keep them as part of a dessert tray with an assortment of other little bites, or have a big ‘ole slab all on its own!
- Make ahead and freezer friendly – These can be prepared well ahead of time and then frozen for months!
Helpful Tools
- 8 x 8 Baking Dish – I like that this one comes with a lid for storage.
- Microwave Safe Bowls – You’ll need a large mixing bowl and a medium mixing bowl.
- Silicone Spatulas – I use these for everything!
- Offset Spatula – To easily spread the chocolate.
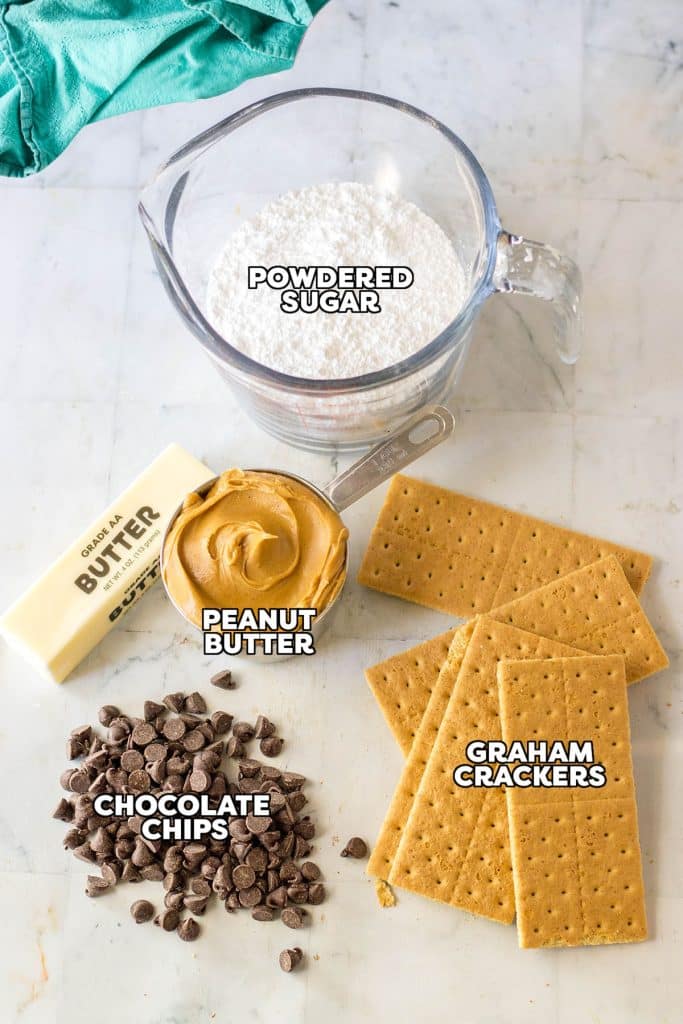
Ingredients
Below is a list of the ingredients you’ll need to gather to make this recipe, why you need them, and possible substitutions. Scroll all the way down for the full recipe card with measurements.
Jump- Butter – Using melted butter is an added fat that helps with the texture and consistency of the peanut butter mixture. Adds a creamy richness and also adds that extra buttery flavor.
- Powdered Sugar – Also sometimes called confectioners’ sugar or icing sugar. This is what gives the bars their sweetness without the grittiness of granulated sugar. Using powdered sugar helps the bars to set properly because of the cornstarch added to them.
- Graham Cracker Crumbs – Provide a yummy flavor of course, but also help to absorb excess moisture so that the bars are not overly sticky. I love that they add a bit of extra texture too. I pick up the box of graham crumbs to save a step, but you can crush your own crackers in a food processor or in a freezer bag with a rolling pin.
- Creamy Peanut Butter – I recommend using the regular kind (like Skippy or Jif) just because it will hold better than the runnier, oilier natural kind. Creamy is the classic choice, but for added texture, you could use crunchy instead.
- Semi-Sweet Chocolate Chips – For the delicious chocolate layer! Use dark chocolate, milk chocolate, or semi-sweet chocolate, it’s up to you. You could also switch it up with some white chocolate.
How to make Lunch Lady Bars
This section shows you how to make this recipe, with process photos showing the steps to help you visualize it. For full instructions, including amounts and temperatures, see the recipe card below.
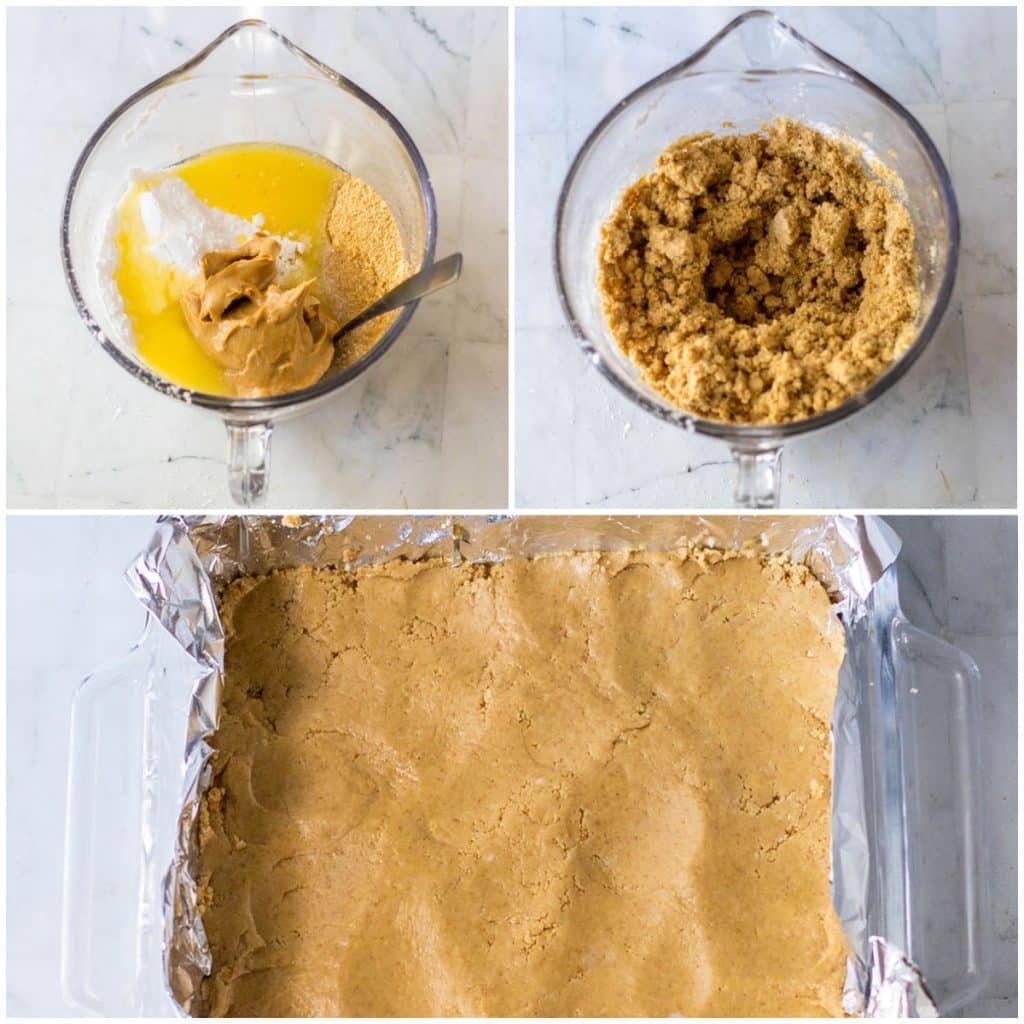
Jump- Step One: Combine melted butter, powdered sugar, graham cracker crumbs, and peanut butter in a large bowl. Mix until well combined.
- Step Two: Spread the mixture evenly into the bottom of a prepared 8×8 baking dish, which has the foil or parchment paper lining overhanging on the sides.
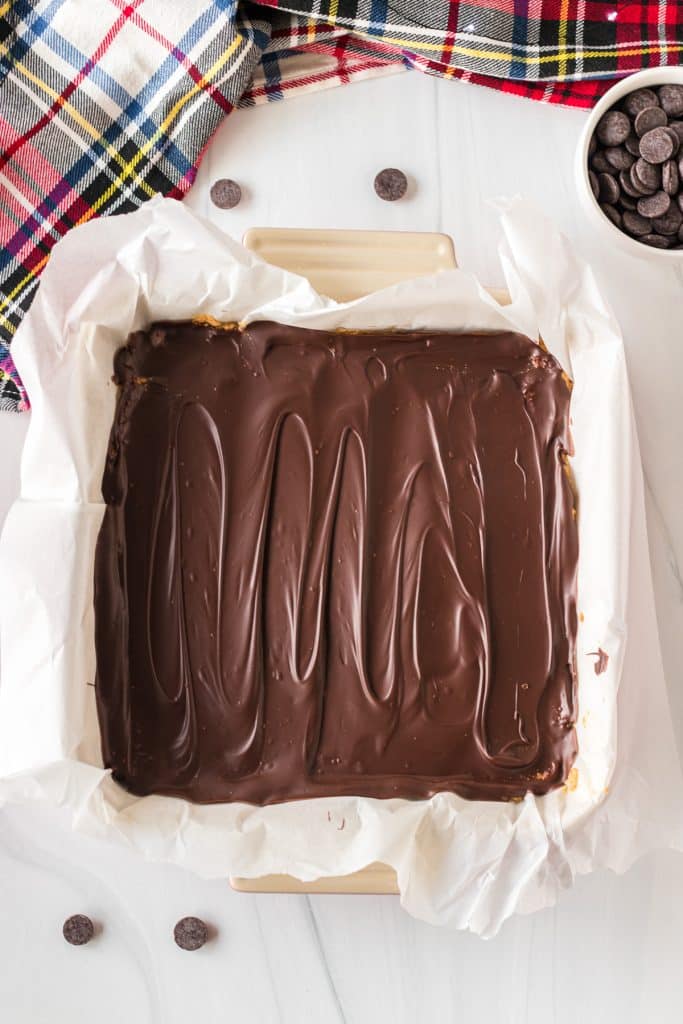
- Step Three: In a medium microwave-safe bowl, melt the chocolate chips in 30-second intervals, stirring in between until melted and smooth. Spread the melted chocolate in an even layer over the bottom layer. Use an offset spatula to spread it across.
- Step Four: Transfer the dish to the fridge to allow it to chill and set it for 1 hour until firm.
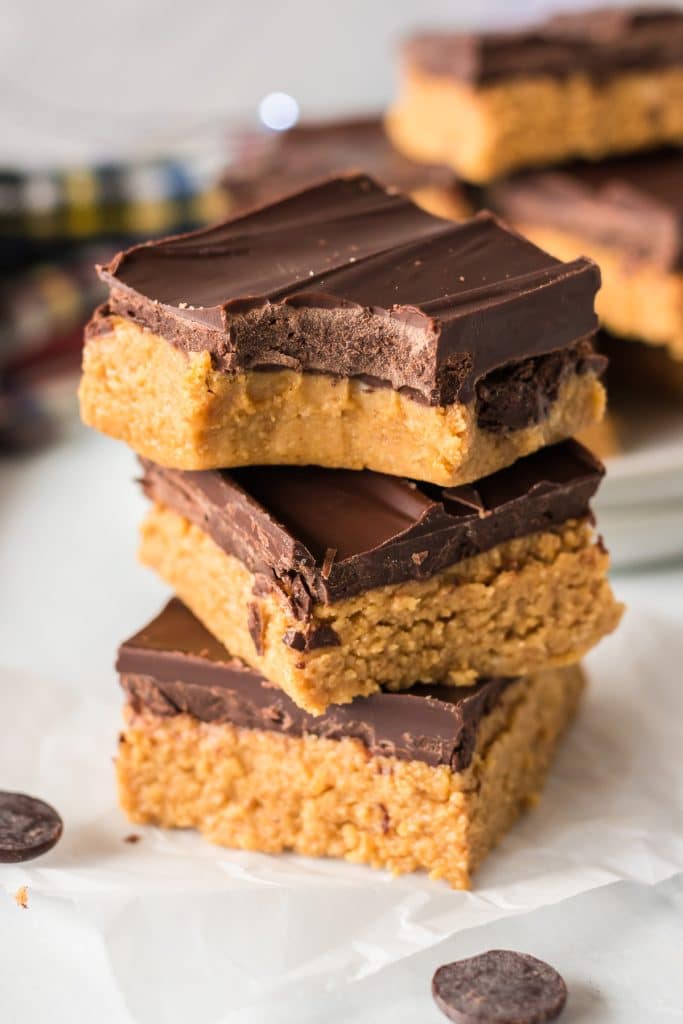
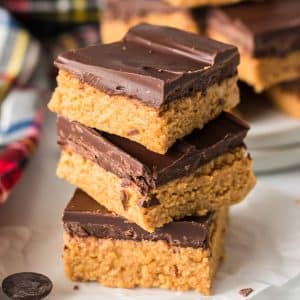
- Step Five: Remove the bars from the pan and carefully slice into 16 bars. Enjoy!
Forewarning, they’re incredibly addicting so no one would blame you if you were to reach for another!
- Only heat the chocolate for 30-second intervals. Overheating it could cause it to seize and it’ll no longer be useable.
- Once out of the fridge after setting, let it sit for 10 minutes before slicing.
- For clean and tidy edges to the chocolate peanut butter bars, wipe the knife clean in between each slice.
- Leave a bit of parchment paper or foil overhanging the sides. This will help with easy lifting out of the pan once they’re set.
- If you can’t find graham cracker crumbs, make your own in a blender or food processor.
- A sprinkle of coarse flaked salt on top of the chocolate before setting is a great way to finish these bars. The sweet and salty combo is so good.
- To celebrate a holiday or occasion, top the chocolate with some sprinkles.
Storage & Leftovers
How to store leftovers
These can be kept out for a few hours while on the dessert table. After that, you always want to keep them covered in an airtight container.
How long will peanut butter bars last in the fridge?
These will be kept fresh for up to 4 days in the fridge.
Can I freeze them?
You can! Peanut butter bars freeze really well, so go ahead and make 2 batches and freeze one. Keep them stored in a freezer-friendly container or freezer bag, layered with parchment paper so that they don’t stick together when frozen.
They’ll be good for up to 3 months. Before serving, allow them to thaw overnight in the fridge, so they’re not rock solid.
FAQs
You can either make two separate batches in two separate 8×8 containers or make a bigger batch in a 9×13 dish.
If you plan on freezing an entire batch, I suggest using 2 separate ones, even using a disposable foil dish if you’re bringing it to a party or potluck.
I might suggest salted butter because there is no additional salt being added. However, if you’re using unsalted, you can add a pinch of salt to the peanut butter mixture.

No Bake Chocolate Peanut Butter Bars
Video
Ingredients
- ½ cup salted butter
- 1 ½ cups powdered sugar
- 1 ½ cups graham cracker crumbs
- 1 cup creamy peanut butter
- 12 ounces semi-sweet chocolate chips melted
Instructions
- Line an 8×8 baking dish with foil or parchment paper and leave some overhang on the sides to make it easier to lift the bars from pan.
- In a large microwave-safe bowl. melt the butter.1/2 cup salted butter
- To the melted butter, add the powdered sugar, graham cracker crumbs, and peanut butter.1 ½ cups powdered sugar, 1 ½ cups graham cracker crumbs, 1 cup creamy peanut butter
- Mix until well combined.
- Spread the peanut butter mixture evenly into the bottom of the pan.
- In a medium microwave safe bowl melt the chocolate chips in 30 second intervals, stirring in between, until melted and smooth.12 ounces semi-sweet chocolate chips
- Carefully spread the melted chocolate evenly over the peanut butter later with an offset spatula.
- Refrigerate 1 hour until firm.
- Remove the bars from pan and carefully slice into 16 bars.
- Serve and enjoy!
Notes
- Melt chocolate in 30-second bursts, stirring in between to avoid seizing.
- Let bars sit at room temp for 10 minutes after chilling before slicing.
- For clean cuts, wipe knife between slices.
- Use overhanging parchment or foil for easy removal from the pan.
- Make graham cracker crumbs at home if needed—just blend or process.
- Add flaky salt or sprinkles on top before setting for extra flavor or festivity.
- Store in an airtight container; safe at room temp for a few hours.
- Keeps fresh in the fridge for up to 4 days.
Nutrition
Nutritional information is an estimate and provided to you as a courtesy. You should calculate the nutritional information with the actual ingredients used in your recipe using your preferred nutrition calculator.
Did you make this recipe?
Tag me on Instagram @melissa_pplates so I can see!Did You Make This?
If you made this recipe, I’d love to know how it went in the comments section below.
You can also tag me on Instagram – @melissa_ppplates or share a pic in the Persnickety Plates Community Facebook group. I love seeing what you’ve tried!
Need more dessert bar recipes? Try these:
Banana Pudding Cheesecake Bars
Click here for my entire collection of dessert bar recipes.
How about some other peanut butter chocolate recipes? Try these:
Brownie Bottom Peanut Butter Cheesecake
Peanut Butter Cookie Cups with Chocolate Ganache
Click here for my entire collection of peanut butter recipes.


Love the Recipes.
Thanks for sharing.
Thanks, Diana! 🙂
Easy peasy. I always made another version. This was way easier. I ended up using crushed pretzels. Won’t be as sweet but grandsons licked the spoons clean between the chocolate and the peanut butter mixture.
Thanks
I love the idea of pretzels! That’ll be a great balance.
These remind me of my favorite 8th grade school cafeteria dessert! I lived for those! Years ago, I even wrote to the district to see if they would share the recipe and I’d even sign an NDA to keep the recipe to myself. They thanked me but didn’t have the recipe (so they said!) I bet this is as close to them as I can get!!!
ha! I hope this lives up to the memories 🙂